10 Stunning Nail Art Black Design Ideas for a Bold, Chic Manicure
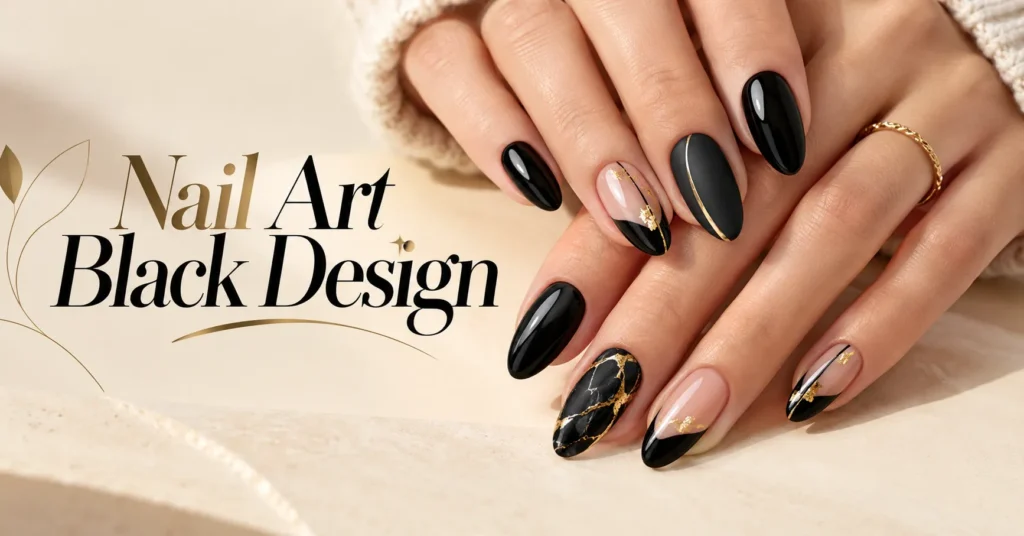
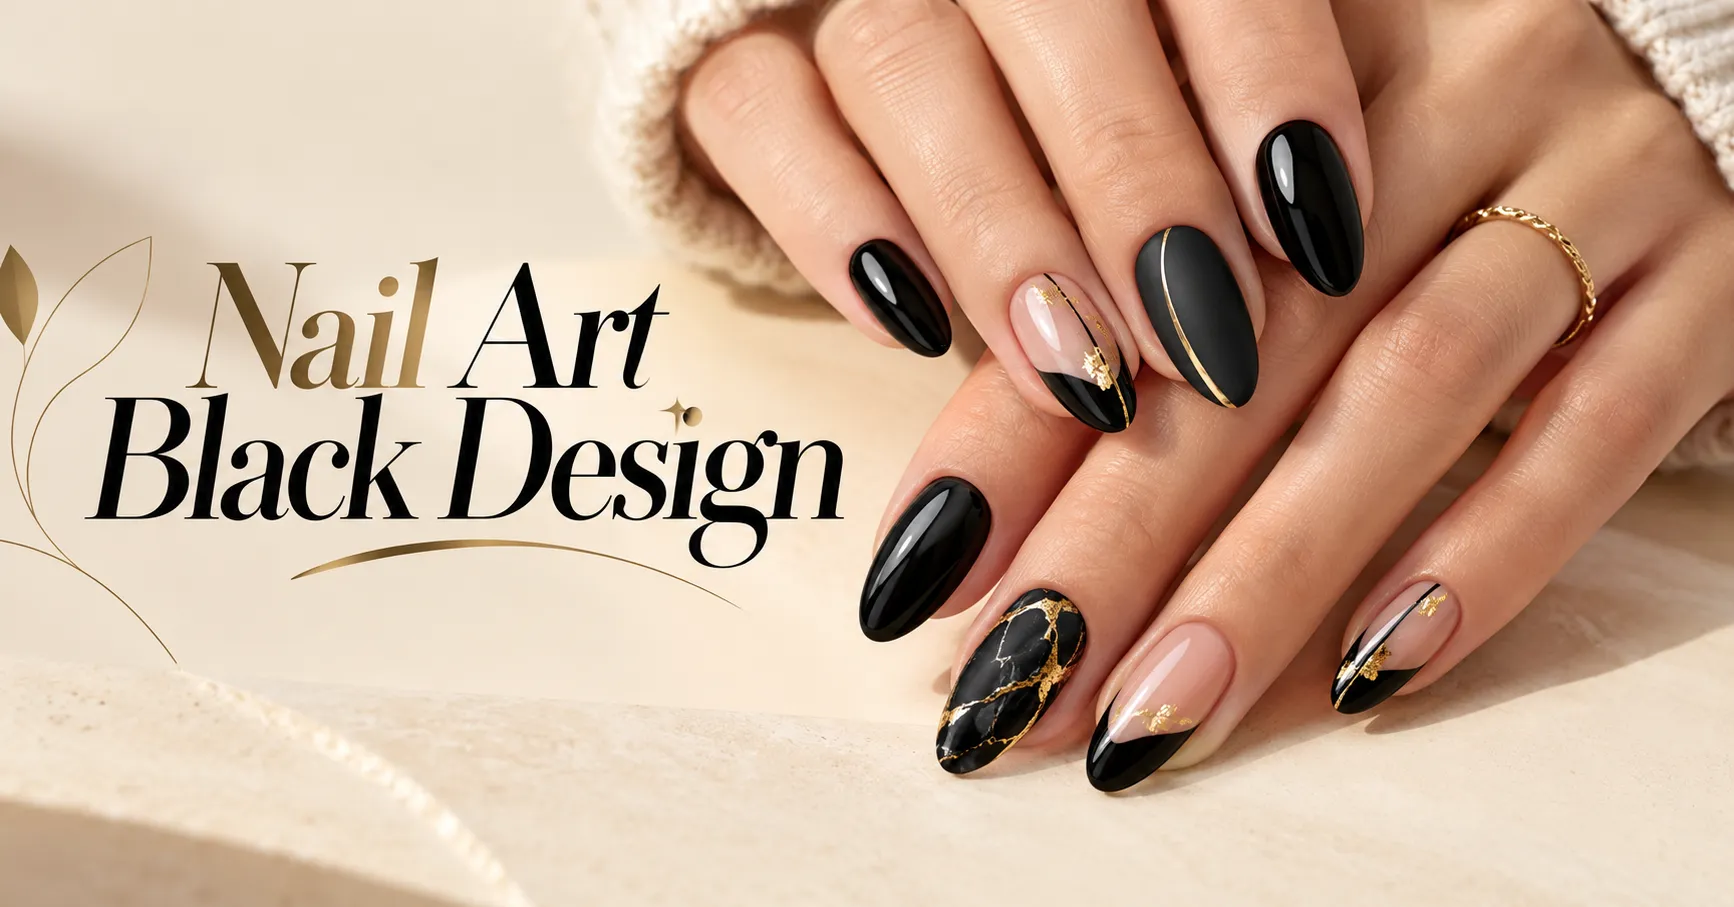
Black nails have a quiet kind of power. They look sharp with a white tee, glamorous with a cocktail dress, and right at home at a rock concert. If you want a manicure that feels confident and never boring, a nail art black design is one of the smartest choices you can make.
The beauty of black is its range. It can be soft and velvety, sleek and glossy, edgy and dramatic, or barely there. In this guide, we’ll share 10 nail art black design ideas, from beginner-friendly looks you can paint at your kitchen table to detailed styles worth booking a salon appointment for.
You’ll also learn how to pick the right design for your nail shape, how black gel nails compare with regular polish, and how to avoid the streaks and stains that dark shades sometimes leave behind.
Why Black Nail Art Never Goes Out of Style
Some trends burn bright and fade within a season. Black nail art isn’t one of them. It has moved from punk and goth subcultures into fashion runways, red carpets, and everyday offices. Today, it’s simply a classic, much like the little black dress.
Part of that staying power comes from versatility. A nail art black design adapts to almost any mood. Pair it with gold for elegance, chrome for a futuristic edge, or bare nail for clean minimalism. The same shade can feel completely different depending on the finish and details you choose.
Here’s why so many people keep coming back to dark nail designs:
- It goes with everything. Black matches every outfit color, pattern, and accessory.
- It flatters every skin tone. Deep, rich black creates a striking contrast on fair, medium, and deep skin alike.
- It makes details pop. Gold foil, rhinestones, and chrome stand out beautifully against a dark base.
- It works all year. Black feels moody in fall, festive in winter, and surprisingly fresh in spring and summer.
- It signals confidence. A black manicure has an effortless, self assured attitude.
There is one trade-off worth knowing. Black shows chips and messy edges more clearly than pale shades. That’s why good prep and careful cleanup matter so much, and we’ll cover both later in this guide.
How to Choose the Right Nail Art Black Design for You
Before you jump into the ideas, take a moment to think about your nails, your skin tone, and your daily routine. These three factors will help you land on a look you’ll love wearing for weeks.
Match the Design to Your Nail Shape and Length
Some designs need room to shine, while others look best on short, tidy nails. Use this table as a quick starting point.
| Nail Shape | Best Length | Black Designs That Shine | Why It Works |
| Almond | Medium to long | Chrome black, marble, cat-eye | The tapered tip flatters reflective and flowing designs |
| Square | Short to medium | Black French tips, geometric lines | Straight edges highlight crisp, graphic details |
| Round | Short | Matte solid black, minimalist dots | Low-maintenance and practical for busy hands |
| Coffin | Long | Gothic lace, glitter ombré, rhinestones | A wide, flat tip offers space for detailed art |
| Oval | Short to medium | Floral stamping, negative space | Soft curves suit delicate patterns |
| Stiletto | Long | Gothic nail art, chrome black | A dramatic shape matches a dramatic color |
A good nail art black design works with your shape, not against it. If you have short nails, don’t worry. Black actually makes short nails look neat and intentional, especially in a matte or minimalist style.
Consider Your Skin Tone and Undertone
Black flatters everyone, but the accent colors and finishes you pair with it can make your manicure look even better.
If you have warm undertones, gold accents, bronze foil, and soft brown-black shades look especially rich. If you have cool undertones, silver chrome, icy holographic glitter, and blue-black polish feel crisp and bright. Neutral undertones can pull off almost any combination, so feel free to mix metals.
Think About Your Daily Routine
Your lifestyle should guide how bold you go. If you work in a conservative office, minimalist black nails or black French tips feel polished without being distracting. If you work in a creative field, or you just love a statement, gothic lace or chrome black nails might suit you better.
Also think about how hard you are on your hands. If you type all day, wash dishes often, or work with your hands, durable black gel nails or dip powder will save you from constant touch-ups.
10 Nail Art Black Design Ideas to Try Right Now
Now for the fun part. These 10 designs cover a range of styles, skill levels, and occasions. Each one includes a short explanation, its main benefits, and simple tips for getting it right.
1. Matte Black Nails
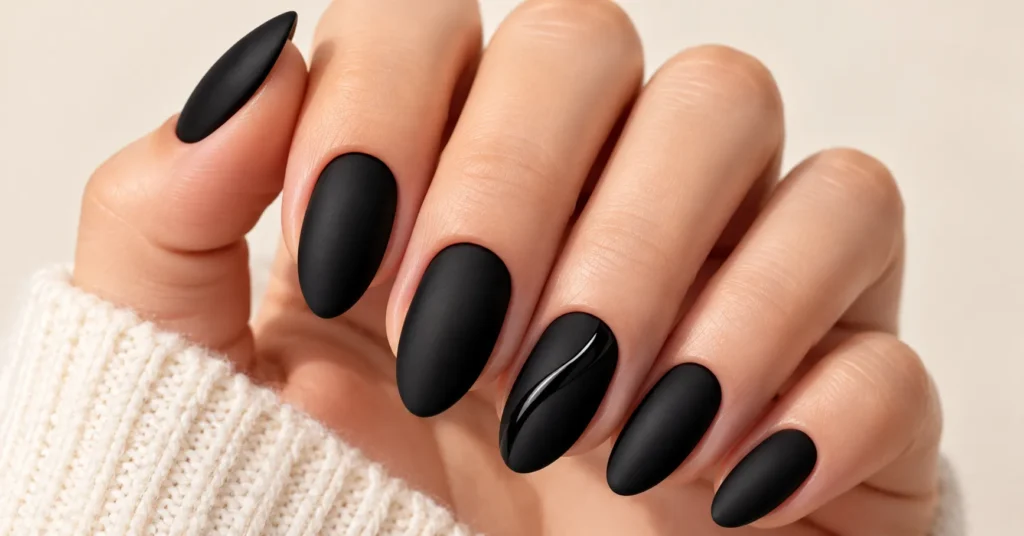
Matte black nails are proof that simple can be striking. Instead of a high shine finish, a matte top coat gives your nails a soft, velvety look that feels modern and refined.
This style works on every nail shape and length. It also photographs beautifully, since matte surfaces don’t create glare under bright lights.
How to create it:
- Apply a base coat to protect your natural nails.
- Paint two thin coats of black polish, letting each one dry.
- Finish with a matte top coat instead of a glossy one.
Matte black nails are the simplest nail art black design on this list, but they never look basic. For an extra twist, paint a thin glossy line along the tips over the matte base. The contrast between shiny and flat finishes is subtle but eye-catching.
Good to know: Matte finishes can pick up oils from your skin and start to look shiny over time. Avoid applying hand lotion directly to your nails, and keep a matte top coat handy for quick refreshes.
2. Black French Tips
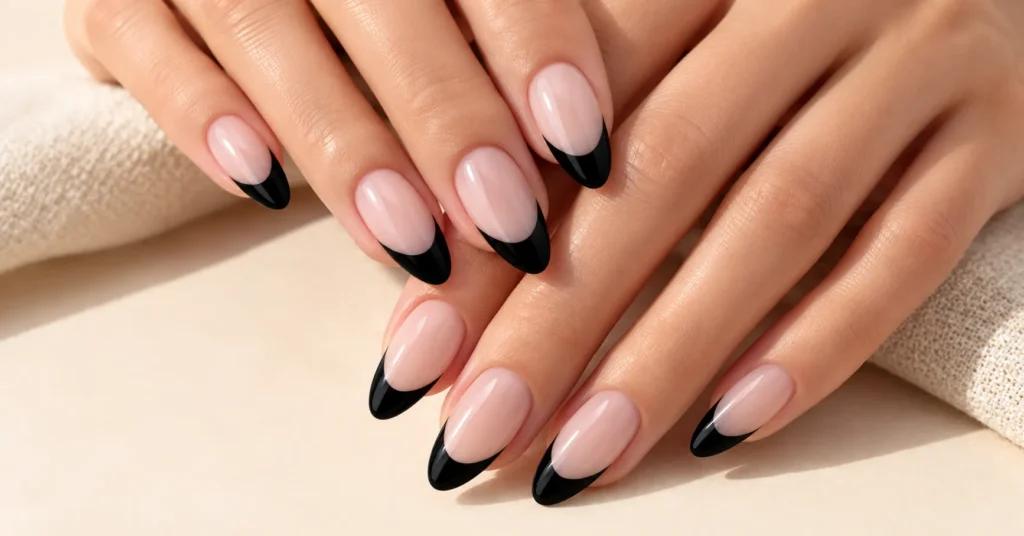
The classic French manicure gets a bold makeover when you swap the white tip for black. Black French tips feel fresh, edgy, and surprisingly elegant.
Start with a sheer pink, nude, or milky base. Then paint a curved black line along the free edge of each nail. You can play with the shape to change the vibe:
- Micro French: A super thin black line for a subtle, chic effect.
- Deep French: A thicker tip that covers more of the nail for a bolder look.
- V-tip: A pointed tip that elongates fingers, especially on almond nails.
If you’re new to any nail art black design, black French tips are a great starting point. French tip guide stickers make the line easy to paint. Another popular trick is to brush black polish onto a silicone stamper and gently press your nail tip into it at an angle.
Black French tips are also office friendly, which makes them ideal if you want something stylish that still feels professional.
3. Negative Space Black Nails
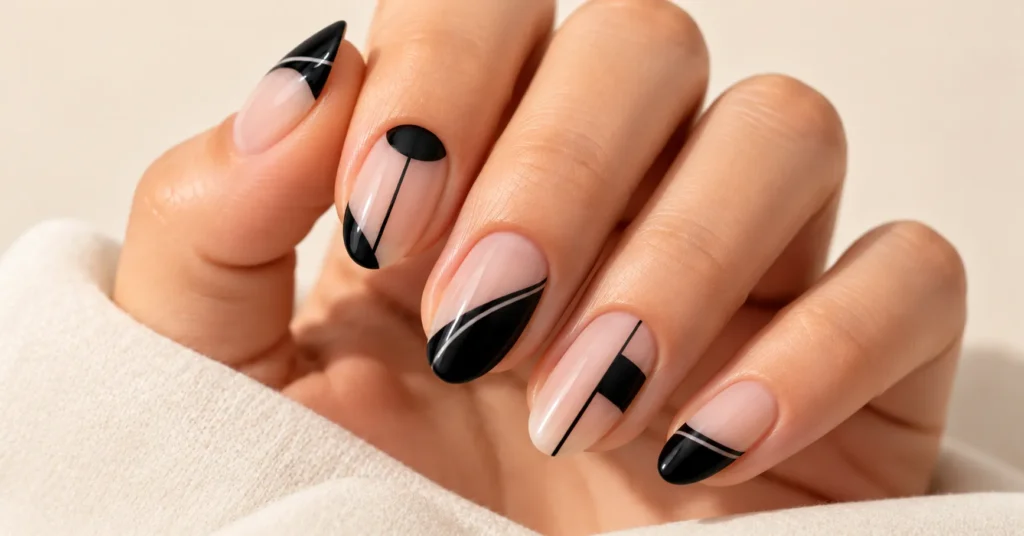
Negative space nails leave part of the natural nail bare, using black polish to create shapes around it. The result looks clean, artistic, and modern.
Popular negative space ideas include black half moons near the cuticle, sharp triangles, diagonal stripes, and cut out windows. You can also outline the nail with a thin black border and leave the center clear.
The biggest benefit? This look grows out gracefully. Because so much of the nail is already bare, the gap at the cuticle is barely noticeable after a week or two. This nail art black design is especially smart if you don’t have time for frequent salon visits.
Pro tip: Use striping tape or nail vinyls for crisp edges. Lay them on a fully dry base coat, paint over them, and peel them off while the polish is still slightly wet. Then seal everything with a glossy top coat so the bare sections look polished, not unfinished.
4. Chrome Black Nails
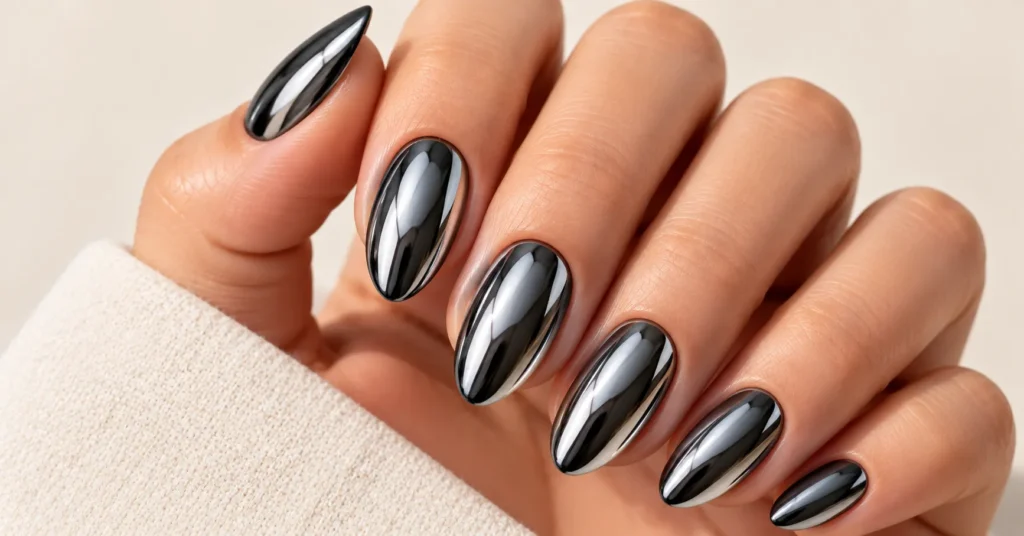
Chrome black nails look like liquid metal. A nail tech applies a black gel base, cures it, and then rubs a fine chrome powder over the surface. The powder creates a mirror-like shine that shifts in the light.
You can choose from several chrome finishes over black:
- Silver chrome for a sleek, futuristic look.
- Gold chrome for a warm, luxurious glow.
- Aurora or holographic chrome for a rainbow shimmer that changes with every angle.
Chrome black nails turn a classic nail art black design into something bold and high fashion. They look stunning on almond and stiletto shapes, where the curved surface catches the most light.
This look usually requires gel polish, a UV or LED lamp, and a no wipe top coat, so most people get it done at a salon. That said, at home chrome kits are widely available if you already own a gel lamp and want to experiment.
5. Black and Gold Accent Nails
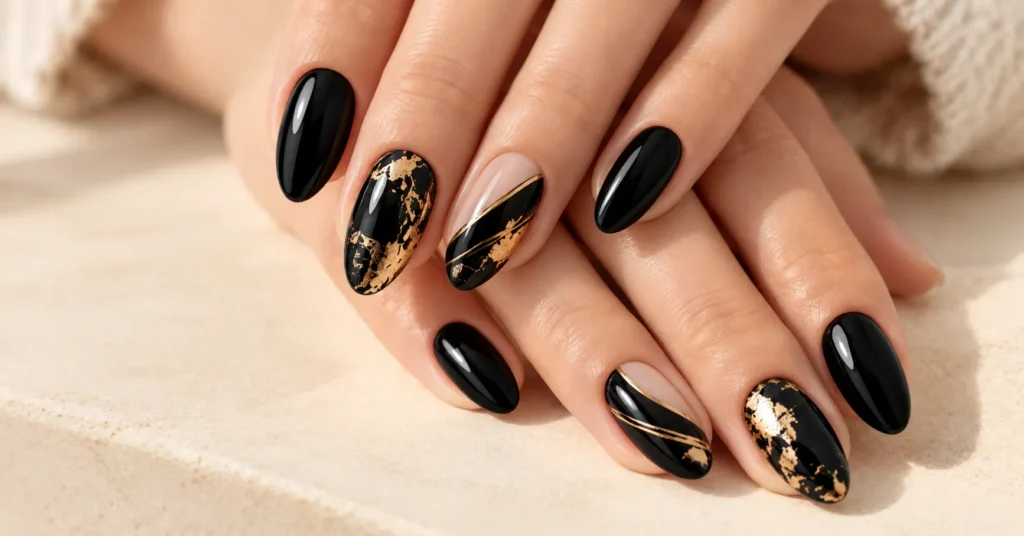
Few color pairings feel as timeless as black and gold. This combination works for weddings, holiday parties, date nights, and any time you want to feel a little glamorous.
There are many ways to bring gold into the mix:
- Add gold foil flakes to one or two accent nails.
- Paint a thin gold stripe down the center of each nail.
- Place a small gold stud near the cuticle.
- Outline black French tips with a fine gold line.
Few combinations feel as luxurious as this nail art black design. The warm metallic tone softens the drama of black and adds instant polish.
How to apply gold foil at home: Paint your black base and let it dry. Apply a thin layer of foil adhesive or a tacky top coat, then press small pieces of foil onto the nail with tweezers. Seal with two layers of top coat to smooth out any edges.
6. Gothic Lace Nail Art
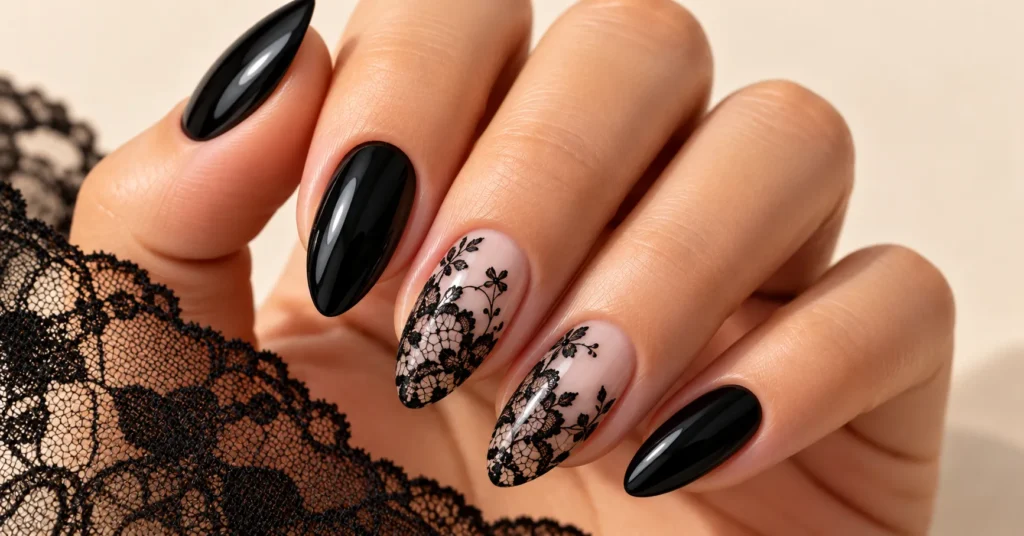
Gothic nail art includes many dark motifs, from crosses and bats to spiderwebs and moons. Lace is its most romantic and elegant form. Delicate black lace patterns over a sheer nude or soft white base look vintage, feminine, and a little mysterious.
You can create lace nails in three ways. Skilled artists paint the pattern freehand with a fine brush. Beginners often use nail stamping plates or ready made lace decals, which deliver detailed results in minutes.
This is one of the most detailed nail art black design options you can choose. It works especially well on coffin and long almond nails, where the pattern has room to breathe.
Lace nails feel right at home around Halloween, but they’re not just seasonal. Paired with a soft pink base, they look lovely at weddings, formal dinners, and romantic evenings out.
Styling idea: Try lace on two accent nails and keep the rest solid glossy black. This balances the busy pattern and makes the lace the focal point.
7. Minimalist Black Line Nails
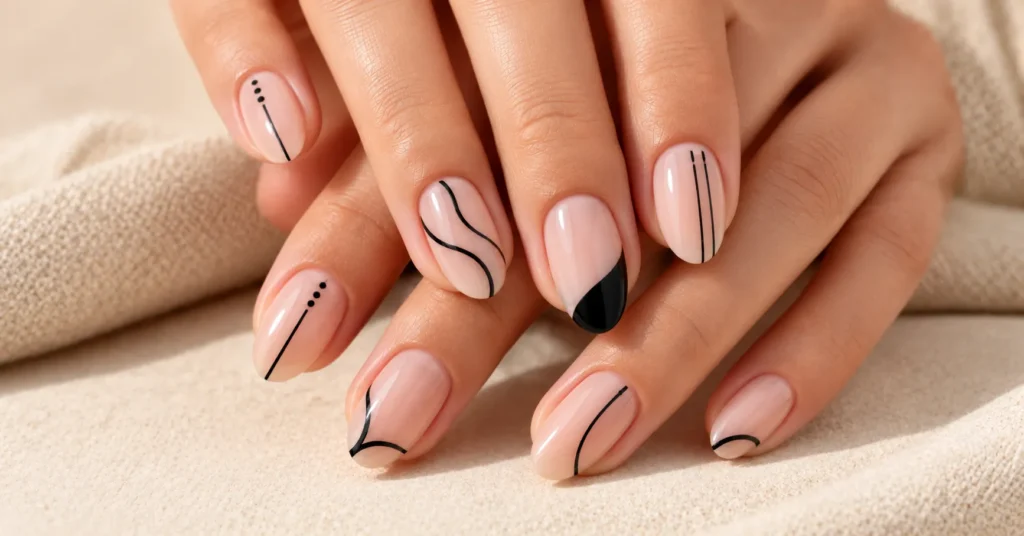
Minimalist black nails use just a few strokes of black to create something chic and understated. Think thin vertical lines, tiny dots near the cuticle, simple swirls, or a single wavy stroke across a nude base.
This style is all about restraint. You leave plenty of empty space so each line stands out. The effect looks thoughtful and polished, like a piece of modern art.
A minimalist nail art black design proves that a tiny amount of black can make a big statement. It’s also one of the best choices for professional settings, interviews, or anyone who prefers a clean aesthetic.
Tools that help:
- A long, thin liner brush for smooth, steady lines.
- A dotting tool for perfectly round dots.
- A highly pigmented black polish, so one stroke is enough.
Rest your painting hand on a table for stability. Pull the brush toward you in one smooth motion rather than dabbing.
8. Black Marble Nails
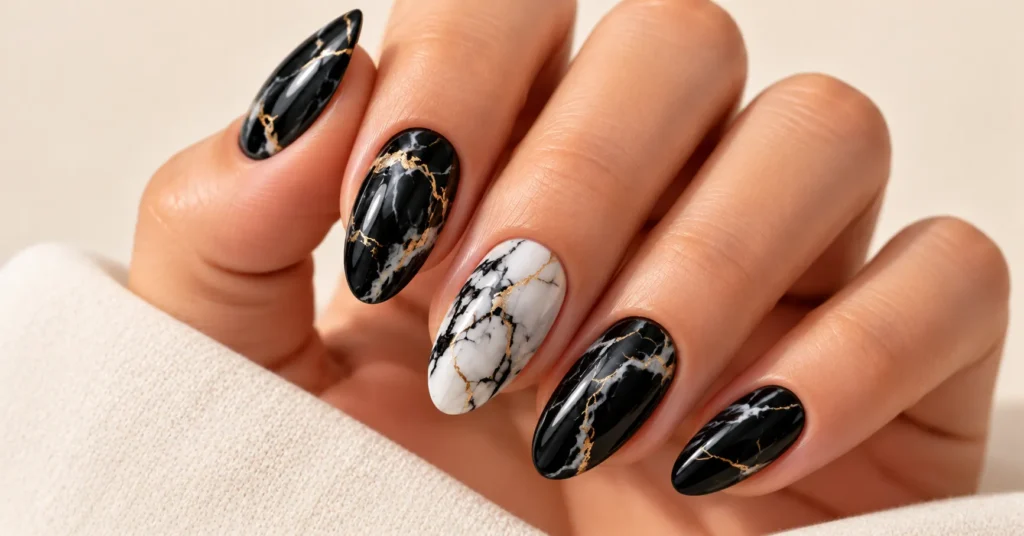
Black marble nails mimic the look of polished stone. You can go classic with a white base and soft black veins, or choose a dramatic black base with gold or white veining.
There are several ways to create marble effects. Salons often use gel polish with alcohol inks or “blooming gel,” which lets colors spread naturally into soft, organic patterns. At home, you can achieve a similar look by dabbing scrunched plastic wrap over wet polish or dragging thin lines with a fine brush and blurring them slightly.
Simple at home method:
- Paint a white or light gray base and let it dry.
- Use a thin brush to draw a few wobbly black lines across the nail.
- Gently soften the lines with a clean brush dipped in a little top coat.
- Add a thin gold vein for extra luxury, then seal with top coat.
Every nail turns out slightly different, which is part of what makes this nail art black design so appealing. No two sets look exactly the same.
9. Black Floral Stamped Nails
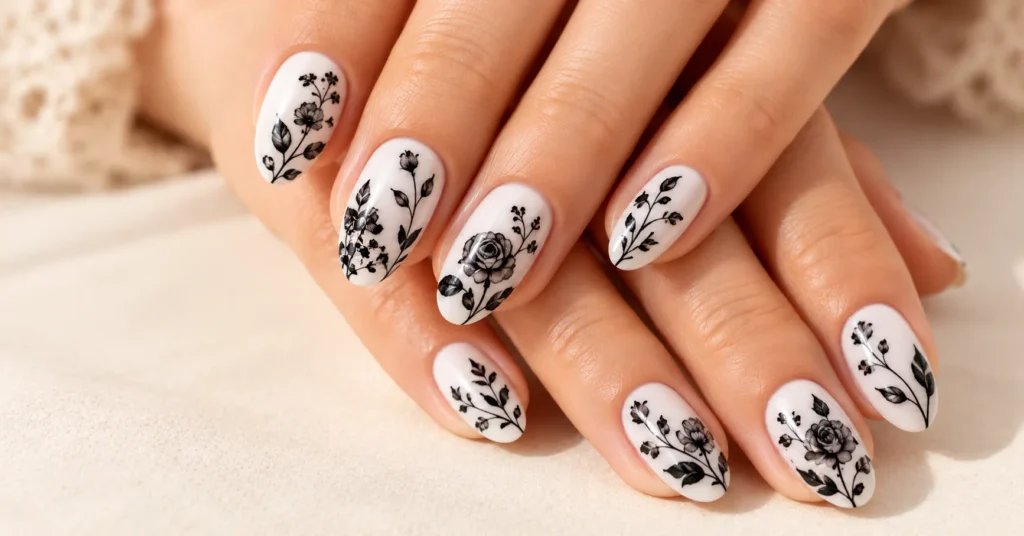
Nail stamping makes detailed artwork possible for almost anyone. You use a metal plate engraved with designs, a scraper, and a soft silicone stamper. The stamper picks up polish from the plate and transfers the pattern onto your nail in one press.
Black floral stamping looks especially beautiful over pastel or white bases. Delicate black roses, wildflowers, or botanical leaves create a high-contrast, graphic effect.
How to stamp your nails:
- Paint your base color and let it dry completely.
- Apply black stamping polish over the design on your plate.
- Scrape off the excess with a quick, light swipe.
- Roll the stamper over the design to pick it up.
- Press or roll the stamper onto your nail.
- Seal with a top coat once the stamped design is dry.
Nail stamping makes intricate nail art black design patterns achievable for beginners. The key is to use a stamping polish, which is thicker and more pigmented than regular polish. It transfers cleanly and gives you crisp, bold lines.
10. Black Glitter Ombré
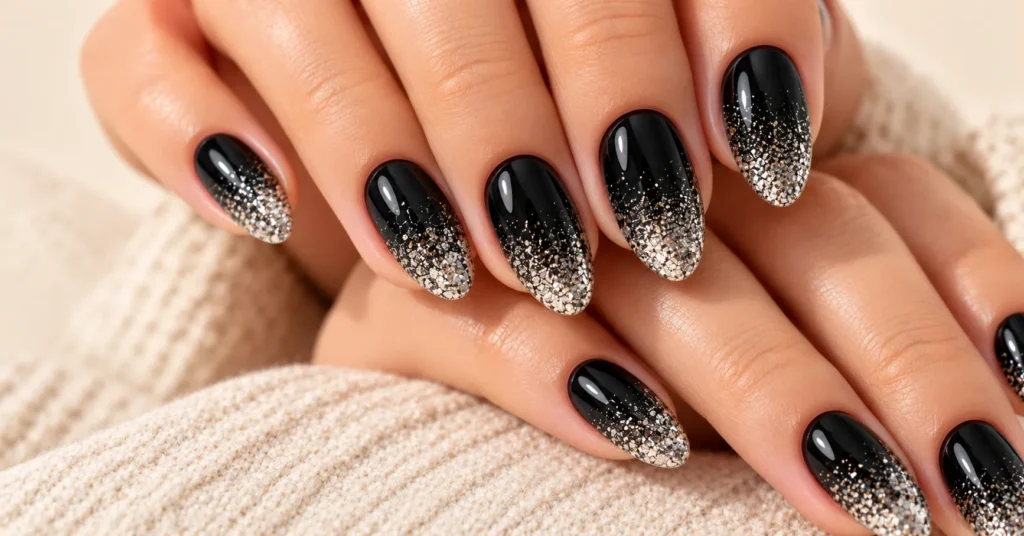
Black glitter ombré blends deep black at the cuticle with sparkling glitter at the tips, or the other way around. It looks like a night sky full of stars, which makes it perfect for parties, concerts, and festive seasons.
Silver, holographic, and gold glitter all look striking against black. For a softer gradient, try fading black into charcoal gray before adding sparkle.
How to create it:
- Paint two coats of black on each nail.
- Dab glitter polish onto a makeup sponge.
- Press the sponge onto the tips, building more sparkle toward the edge.
- Seal with a thick top coat to smooth the glitter.
Glitter is forgiving, so small mistakes disappear. Black glitter ombré ends this list of nail art black design ideas with a little sparkle, and it’s a great pick if you want dark nail designs that still feel celebratory.
Quick Comparison: Which Nail Art Black Design Fits You?
Still deciding? This table breaks down each idea by difficulty, DIY potential, ideal length, and typical wear time.
| Design | Difficulty | DIY Friendly? | Best Nail Length | Typical Wear Time* | Best For |
| Matte Black Nails | Easy | Yes | Any | 5–7 days | Everyday, modern style |
| Black French Tips | Easy to medium | Yes | Short to medium | 5–7 days | Work, casual outings |
| Negative Space Black Nails | Medium | With tape | Short to medium | 7–10 days | Low-maintenance wear |
| Chrome Black Nails | Medium to hard | With gel kit | Medium to long | 2–3 weeks (gel) | Parties, statement looks |
| Black and Gold Accent Nails | Medium | Yes | Medium to long | 5–7 days | Weddings, holidays |
| Gothic Lace Nail Art | Hard | With decals or stamping | Long | 5–7 days | Halloween, formal events |
| Minimalist Black Line Nails | Easy to medium | Yes | Any | 5–7 days | Office, interviews |
| Black Marble Nails | Medium | Yes | Medium to long | 5–7 days | Everyday elegance |
| Black Floral Stamped Nails | Medium | Yes | Short to medium | 5–7 days | Spring, casual events |
| Black Glitter Ombré | Easy | Yes | Any | 5–7 days | Nights out, celebrations |
*Wear times are estimates for regular polish unless noted. Gel and dip powder usually last two to three weeks.
Black Gel Nails vs. Regular Polish
The type of polish you use affects durability, cost, and how easy your manicure is to remove. Dark shades also have some unique quirks, so it’s worth comparing your options.
| Feature | Black Gel Nails | Regular Black Polish |
| Wear time | 2–3 weeks | 5–7 days |
| Dry time | Cures in seconds under a UV/LED lamp | 20–60 minutes to fully set |
| Smudge risk | Very low after curing | High, especially with dark shades |
| Shine | Long-lasting high gloss | Glossy at first, dulls with time |
| Working time for art | Unlimited until cured | Limited, as polish dries quickly |
| Removal | Soak-off with acetone, 10–15 minutes | Quick with standard remover |
| Cost | Higher, especially at salons | Budget-friendly |
Black gel nails have a real advantage for detailed work. Because gel doesn’t harden until you cure it, you can take your time with lines, marbling, and lace patterns. For any detailed nail art black design, gel gives you more control and fewer smudges.
Regular polish makes sense if you love changing your nails often or want to try a bold look for a single weekend. It’s also easier to remove, which matters with black, since removal can get messy.
Dip powder is a third option. It’s durable like gel and doesn’t need a lamp. Black dip powder gives a deep, even color with excellent coverage, though it’s harder to use for fine detail work.
Essential Tools for Black Nail Art at Home
You don’t need a professional kit to create a beautiful nail art black design. A few affordable tools will cover almost every idea on this list.
| Tool | What It Does | Designs It Helps With |
| Base coat | Prevents staining and helps polish grip | All designs |
| Highly pigmented black polish | Gives full coverage in fewer coats | All designs |
| Matte top coat | Creates a velvety, non shiny finish | Matte black nails |
| Striping tape or nail vinyls | Creates clean, sharp lines | Negative space, geometric designs |
| Thin liner brush | Paints fine lines and details | Minimalist lines, marble, lace |
| Dotting tool | Makes even dots of any size | Minimalist designs, accents |
| Stamping kit | Transfers detailed patterns | Floral and lace designs |
| Makeup sponge | Blends color into gradients | Glitter ombré |
| Cleanup brush and acetone | Removes polish from skin | All designs |
Start with the basics: base coat, black polish, top coat, and a cleanup brush. Add specialty tools as you try more advanced designs.
Pro Tips for Flawless Dark Nail Designs
Black is bold, but it’s also unforgiving. Smudges, bald spots, and messy edges are easy to see. These habits will make any nail art black design look salon-made.
Never Skip the Base Coat
Dark pigments can stain your natural nails, leaving a yellow or gray tint after removal. A good base coat creates a protective barrier. It also helps your polish grip the nail, which reduces chipping.
Apply Thin, Even Coats
Many black polishes are highly pigmented, so it’s tempting to apply one thick coat. Resist the urge. Thick layers take longer to dry, dent easily, and peel sooner. Two thin coats give you deeper, smoother color.
If your black polish looks streaky after the first coat, that’s normal. The second coat usually evens everything out.
Clean Up Every Edge
Black polish on your skin is far more noticeable than a stray swipe of pale pink. Dip a small flat brush in acetone and trace around your cuticles and sidewalls after painting. This single step makes the biggest difference between a homemade and professional finish.
Seal and Cap the Tips
When you apply your top coat, swipe the brush lightly along the very edge of each nail. This “caps” the tip and helps prevent chips. It’s especially important for black French tips, where the tip is the star of the design.
Treat Matte Finishes Gently
Matte top coats are more delicate than glossy ones. Keep lotions, oils, and sunscreen off the nail surface when possible. If your matte finish starts to shine, simply apply a fresh layer of matte top coat.
How to Make Your Black Manicure Last (and Remove It Cleanly)
You put time into your nails, so you want them to look sharp for as long as possible. A few simple habits can add days to your black manicure.
- Wear gloves for chores. Hot water and cleaning products break down polish quickly.
- Refresh your top coat every few days. Use glossy or matte to match your original finish.
- Use cuticle oil daily. Healthy cuticles make your whole manicure look fresher.
- Don’t use your nails as tools. Skip opening cans or scraping labels with your fingertips.
Removing a nail art black design takes a bit more care than lighter shades. Black pigment loves to spread onto the skin as it dissolves, which can leave gray smudges around your nails.
To avoid this, apply a thin layer of cuticle oil or petroleum jelly around each nail before you start. Press a remover-soaked cotton pad onto the nail, hold it for about 10 seconds, and then slide it off in one motion toward the tip. Avoid scrubbing back and forth.
For gel, soak cotton pads in acetone, place them on each nail, wrap with foil, and wait 10 to 15 minutes. Gently push off the softened gel with a wooden stick. Never peel or pry gel off, since this can strip layers from your natural nails.
After removal, give your nails a short break. A few days of cuticle oil and a strengthening treatment will help them stay healthy before your next set.
Conclusion
Black nails are more than a trend. They’re a timeless style choice that works for every season, skin tone, and occasion. Whether you prefer soft matte black, sleek chrome, romantic gothic lace, or clean minimalist lines, there’s a nail art black design that fits your personality perfectly.
The secret to a flawless result is simple: choose a look that suits your nail shape and lifestyle, prep your nails carefully, and take your time with cleanup. Gel and dip powder will keep your manicure looking sharp for weeks, while regular polish gives you the freedom to try a new idea every weekend.
Start with an easy design like matte black or black French tips, then work your way up to marble, stamping, or chrome. With a little practice and the right tools, your next nail art black design can look like it came straight from the salon.
Frequently Asked Questions (FAQs) about Nail Art Black Design
Q1: Is black nail art still in style?
A1: Yes. Black nail art has stayed popular for decades and continues to show up on runways, red carpets, and social feeds. Its versatility keeps it relevant, since it can look edgy, elegant, or minimal depending on the design.
Q2: Is black nail polish appropriate for work?
A2: In most workplaces, yes. A minimalist nail art black design, such as micro black French tips or thin black lines on a nude base, looks polished and professional. Keep nails short to medium and avoid heavy embellishments if your workplace is conservative.
Q3: What colors go best with black nail art?
A3: Black is a neutral, so it pairs well with almost everything. The most popular combinations are black with white (for a graphic look), black with gold or silver (for a luxe feel), and black with nude (for minimalist designs). Black also makes neon colors pop dramatically.
Q4: How can I make a black manicure look less harsh?
A4: Opt for a matte topcoat, which softens the look and gives it a velvety texture. Choosing a shorter, rounded nail shape also makes black polish feel less aggressive. Additionally, incorporating negative space or pairing black with a soft color like nude can lighten the overall aesthetic.
Q5: Can I wear black nail art in the summer?
A5: Absolutely! While often associated with autumn and winter, black nail art is a year-round trend. For summer, try a black and white checkerboard pattern, black floral designs on a nude base, or a simple black pedicure.
Q6: What is the easiest nail art black design for beginners?
A6: Matte black nails and black glitter ombré are the easiest. Matte black only requires solid color and a matte top coat, while glitter ombré is forgiving because sparkle hides small mistakes. Black French tips are another great starter option, especially with guide stickers.
Q7: Does black nail polish stain your nails?
A7: It can. Dark pigments sometimes leave a yellow or gray tint on natural nails. Always use a base coat before applying black polish to create a protective barrier and reduce staining.
Q8: How do I keep matte black nails from looking shiny?
A8: Matte finishes can turn shiny when they absorb oils from your skin, lotion, or food. Avoid applying lotion directly to your nails and reapply a matte top coat every few days to restore the velvety finish.
Q9: Can I wear a nail art black design on short nails?
A8: Absolutely. Black looks neat and intentional on short nails. Matte black, minimalist dots, negative space half-moons, and micro French tips all work beautifully on shorter lengths.
Q10: How long do black gel nails last?
A10: Black gel nails typically last two to three weeks with proper prep and care. Wearing gloves for chores and avoiding using your nails as tools can help them last even longer.