10 Stunning Gingerbread Nails Design Ideas You Need to Try This Season
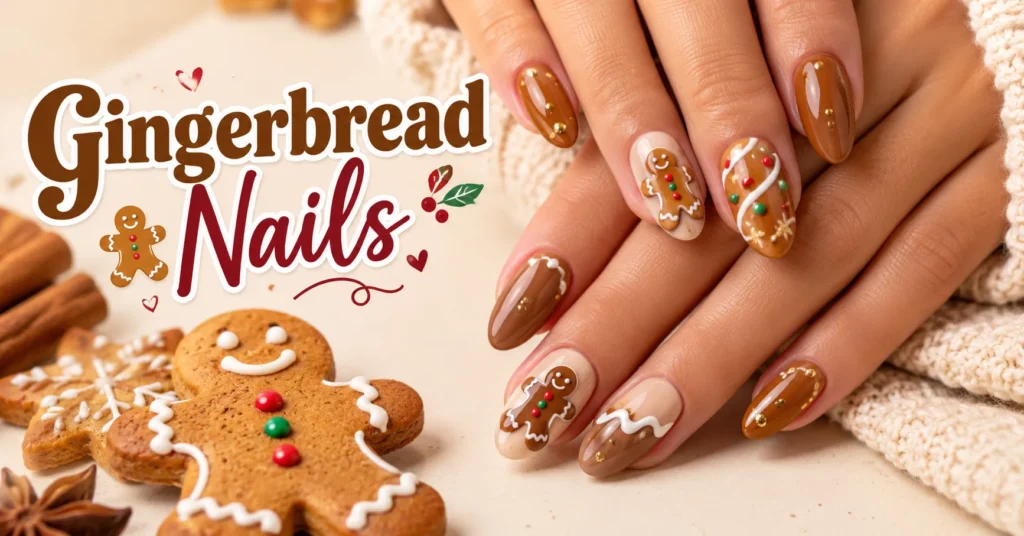
The smell of ginger, cinnamon, and molasses makes the holidays feel official. Now you can wear that feeling on your fingertips. Gingerbread nails blend warm cookie brown shades, crisp white “icing” details, and playful candy accents into one of the sweetest looks of the season. Whether you love bold festive nail art or prefer something subtle for the office, gingerbread nails fit almost any personal style.
This guide covers 10 stunning design ideas, from the classic gingerbread man to glittery ombre and 3D cookie charms. You’ll also find a tool checklist, comparison tables, a step by step tutorial, and pro tips to keep your manicure looking fresh through every holiday party on your calendar.
What Are Gingerbread Nails?
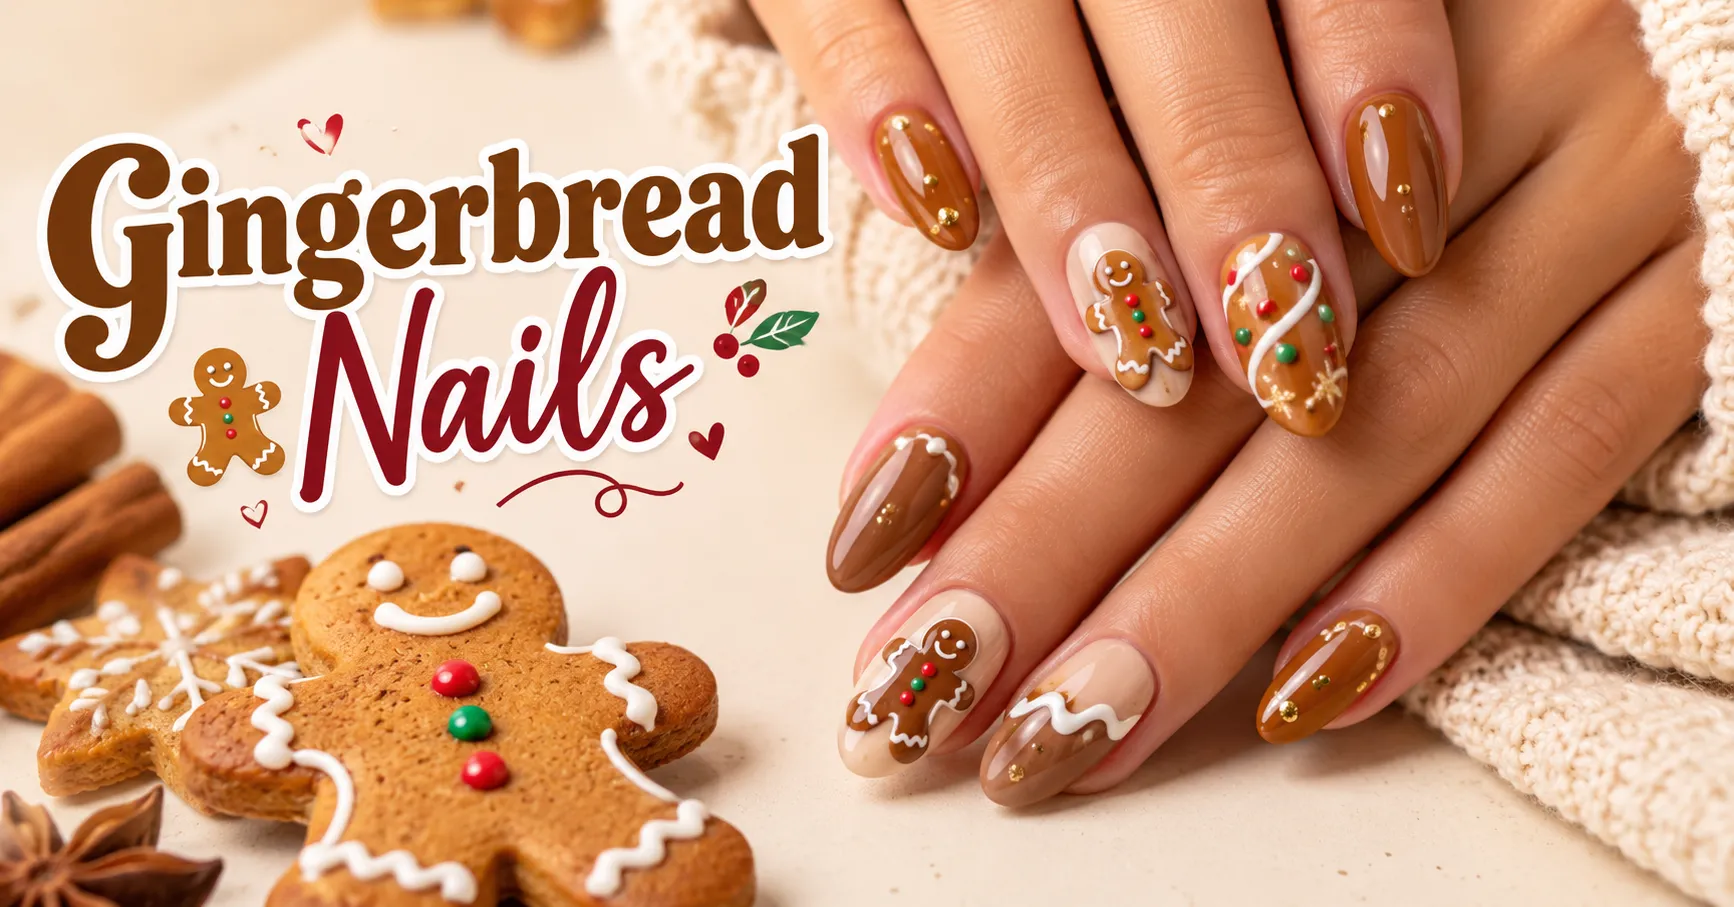
Gingerbread nails are a holiday themed manicure inspired by gingerbread cookies and houses. The base is usually a warm brown, tan, or caramel shade that mimics freshly baked dough. On top, nail artists add white lines, dots, and swirls that look like piped royal icing. Small red, green, or pink touches often stand in for candy buttons and gumdrops.
The look sits right between cute and cozy. You can wear it as a full set of cookie characters or as a single accent nail paired with neutral polish. That flexibility is a big reason the trend comes back every winter.
Many Christmas nail ideas lean heavily on red and green. This style relies on earthy brown nail designs instead. That means you can wear it from late November straight through January without feeling out of season.
Why Gingerbread Nails Are Trending This Season
Social media has turned the cozy nail aesthetic into a full blown movement. People want manicures that feel warm, nostalgic, and a little whimsical, and gingerbread nails check every box. Here’s why so many people are choosing this look for their winter manicure:
- Flattering color base: Warm brown complements nearly every skin tone, from fair to deep.
- Beginner friendly details: Simple dots and lines create the icing effect. You don’t need advanced skills.
- Longer wear season: The look works for Thanksgiving, Christmas, and New Year’s.
- Endless customization: Glitter, chrome, matte finishes, and 3D charms let you match any vibe.
- Built in conversation starter: Expect compliments at every holiday gathering.
Brown tones have also become a year round fashion favorite. Mocha, espresso, and caramel shades show up in clothing, makeup, and home decor. A gingerbread manicure feels on-trend rather than gimmicky, and it pairs naturally with chunky knits, camel coats, and gold jewelry.
Tools and Supplies You’ll Need
You don’t need a professional salon setup to create beautiful holiday nail designs. Most looks in this guide use a handful of basic supplies. Here’s a quick overview of what to gather before you start.
| Tool | Purpose | Beginner Must-Have? |
| Base coat | Protects the natural nail and helps polish grip | Yes |
| Brown polish (tan, caramel, or cinnamon) | Creates the cookie base | Yes |
| White polish or white gel liner | Paints the icing details | Yes |
| Fine detail or striping brush | Draws thin lines and swirls | Yes |
| Dotting tool | Makes buttons, eyes, and sprinkles | Yes |
| Top coat (glossy or matte) | Seals the design and adds finish | Yes |
| Glitter polish | Adds a sugar dusted sparkle | Optional |
| Makeup sponge | Blends ombre gradients | Optional |
| Nail charms and nail glue | Creates 3D accents | Optional |
| LED/UV lamp | Cures gel polish | Only for gel |
If you’re using regular polish, a quick dry top coat will save you plenty of smudge related frustration. For gel, cure each layer fully before adding detail work. That way, your gingerbread nails stay crisp and the icing lines don’t bleed into the base.
10 Stunning Gingerbread Nails Design Ideas
Now for the fun part. Each design below explains what makes it special, how to create it, and who it suits best. Feel free to mix and match ideas to build your own signature set.
1. Classic Gingerbread Man Nail Art
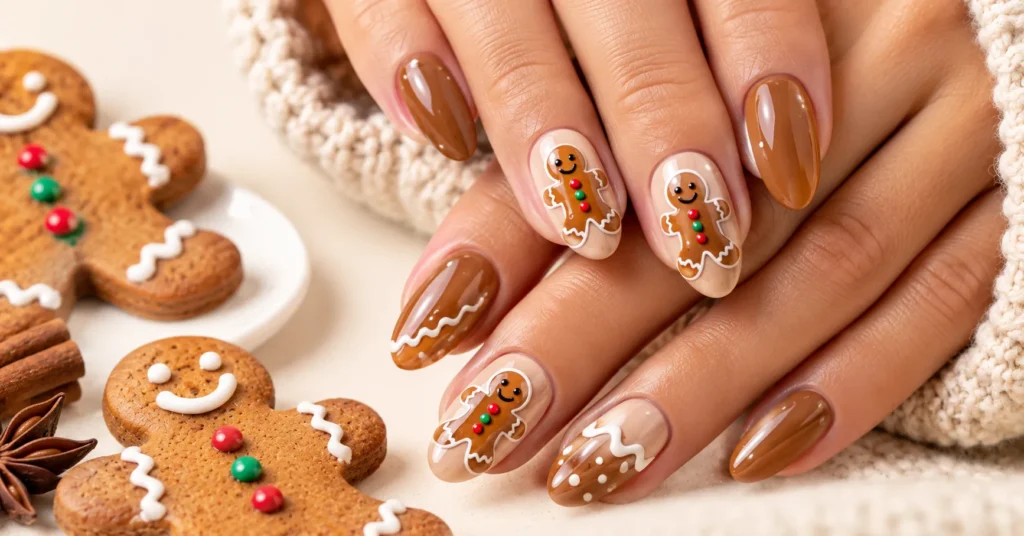
This is the design that started it all. Each nail, or just a few accent nails, features a smiling gingerbread man with white icing outlines, dotted eyes, and tiny candy buttons.
How to create it: Paint two coats of a light tan or nude polish and let them dry. Use a warm caramel shade to paint a simple cookie silhouette: a round head, a body, and four stubby limbs. Then take a thin brush loaded with white polish and trace wavy icing lines across the arms and legs. Finish with black dots for eyes, a tiny curved smile, and red or green dots for buttons.
Short on time? Paint only the cookie’s face peeking up from the tip of the nail. It’s just as cute and takes half the effort.
Best for: Anyone who loves playful nail art designs and wants an instantly recognizable holiday look. It’s especially fun for family gatherings and cookie decorating parties.
2. Brown Glitter Gingerbread Nails
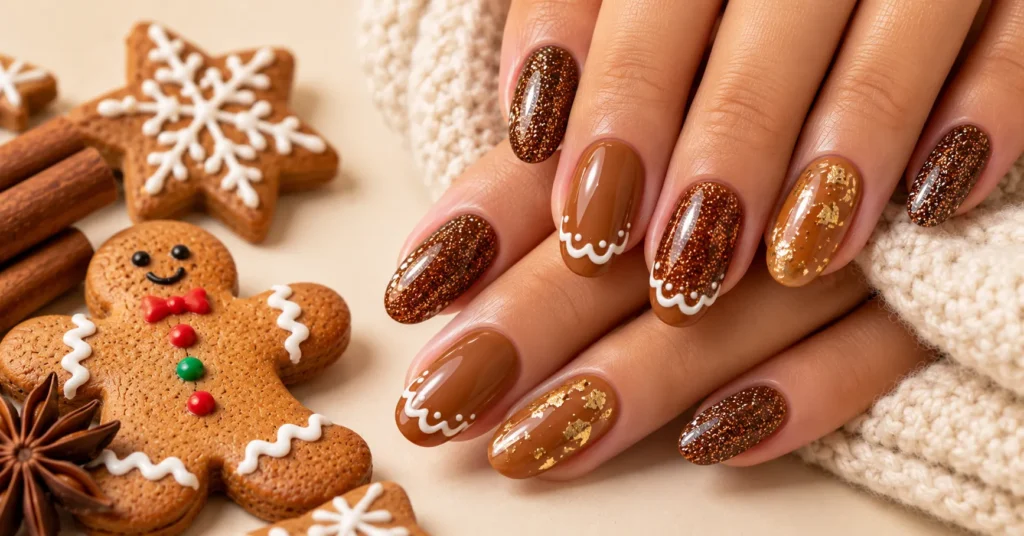
If you love sparkle, this one’s for you. Brown glitter gingerbread nails use a shimmering bronze or copper finish to mimic sugar dusted cookies fresh out of the oven.
How to create it: Start with a warm brown cream polish. Layer one or two coats of fine copper or gold glitter on top. Once dry, use white polish to paint simple icing scallops along the tips or a zigzag across the middle of the nail. Seal everything with a thick glossy top coat to smooth out the gritty glitter texture.
For a luxe twist, skip the glitter on most nails and press chunky gold flakes onto one accent nail per hand.
Best for: Holiday parties, New Year’s Eve, and anyone who wants festive nail art that catches the light from across the room.
3. Ombre Gingerbread Nails
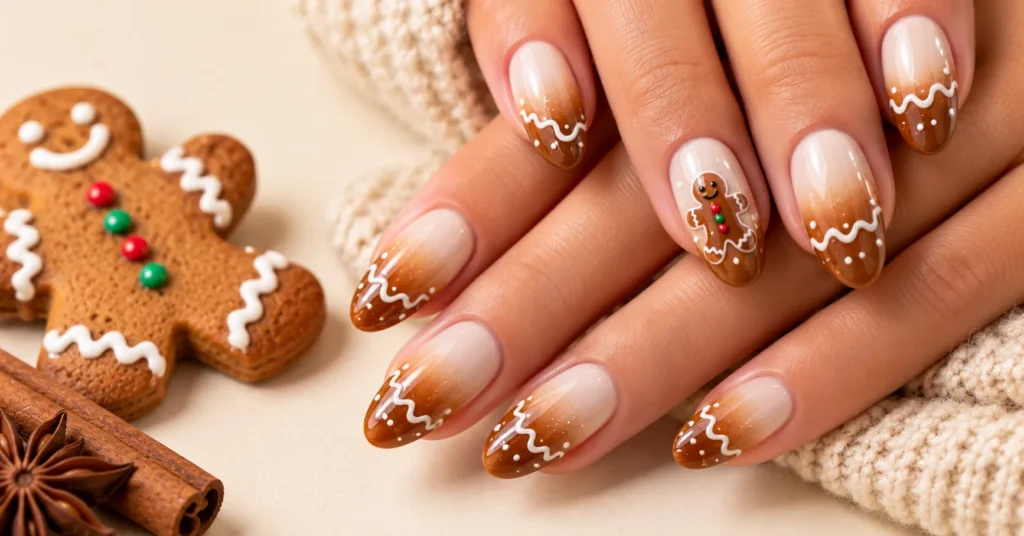
Ombre gingerbread nails blend from pale cream at the cuticle to rich cinnamon brown at the tip. The effect looks like a cookie that’s perfectly golden around the edges.
How to create it: Paint a cream or nude base and let it dry. Brush stripes of cream, light tan, and medium brown side by side onto a makeup sponge. Dab the sponge onto the nail, building two or three thin layers for a smooth gradient. Clean the skin around the nail with a small brush dipped in polish remover.
Once the gradient dries, add a delicate white icing squiggle near the tip. You can also paint a single tiny gingerbread man on the ring finger for a sweet focal point.
Best for: People who want soft, elegant brown nail designs with just a hint of the season. This look is polished enough for the office and pretty enough for date night.
4. Holiday Spice Nail Designs
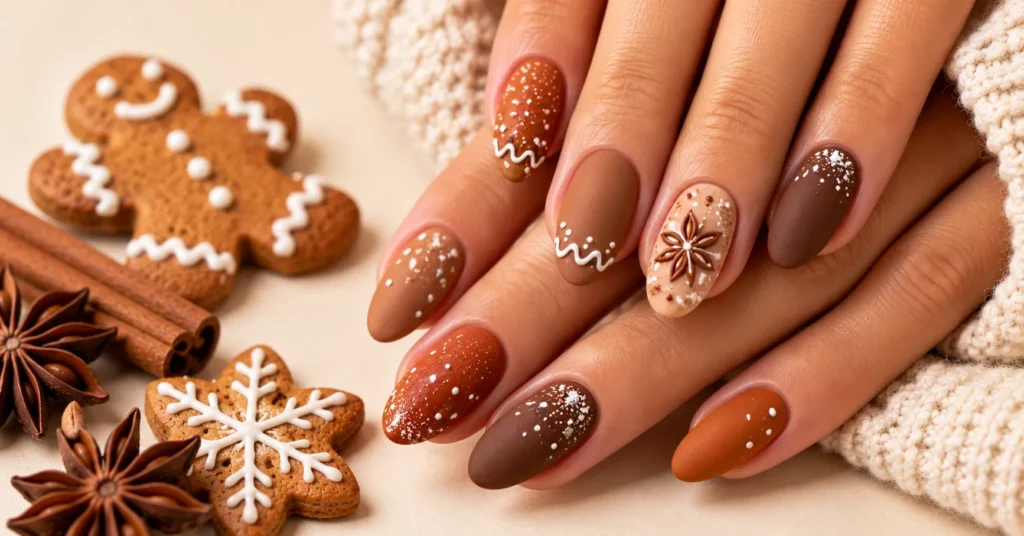
Think beyond the cookie to the spices that give it flavor. Holiday spice nail designs use shades inspired by cinnamon, nutmeg, clove, and ginger root, arranged in a cozy skittle manicure where every nail is a different color.
How to create it: Pick four or five warm shades, such as rust, terracotta, chocolate, caramel, and burnt orange. Paint each nail a different color. On one or two nails, add a tiny star anise drawing or a cluster of white dots that resemble powdered sugar. Finish with a matte top coat for a soft, powdery spice texture.
Best for: Lovers of the cozy nail aesthetic who want a less literal take on gingerbread nails. This palette transitions beautifully from Thanksgiving into December.
5. Icing Drip French Tips
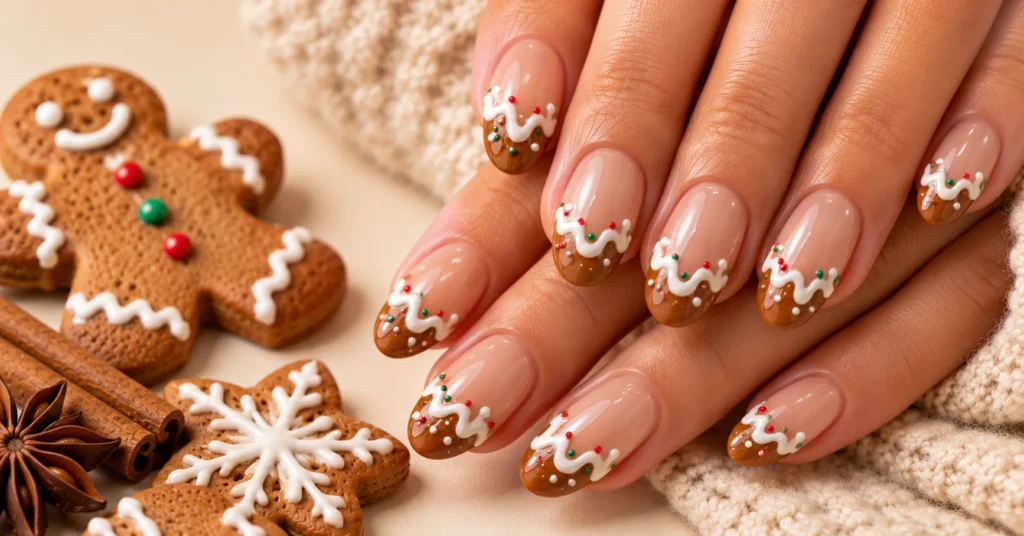
This modern design swaps the classic white French tip for a thick, wavy “icing” line that appears to drip over the edge of a cookie.
How to create it: Paint a sheer nude or light caramel base. Using white gel or a thick white polish, draw a wavy line across the tip with a few small drips extending toward the center of the nail. Gel works especially well here because it creates a raised, almost edible effect. Dot tiny red and green “sprinkles” along the icing for extra charm.
Best for: Fans of French manicures who want to refresh their go to look for the holidays. Subtle yet sweet, these gingerbread nails pair well with both cozy sweaters and cocktail dresses.
6. Gingerbread House Accent Nails
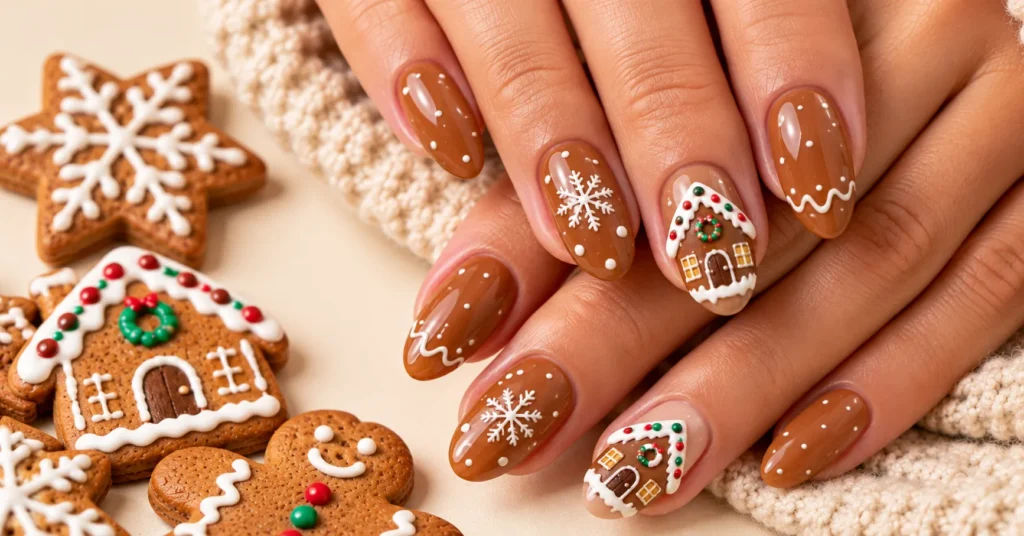
Turn one nail into a tiny piece of edible architecture. These accent nails feature a snowy icing roofline, glowing candy windows, and a peppermint trimmed door.
How to create it: Paint all nails a tan base. On your accent nail, usually the ring finger, paint a triangle roof shape in a darker brown near the cuticle. Outline the roof with white scalloped icing. Add small yellow squares for windows, a little brown door, and red and green dots for gumdrops. Keep the remaining nails simple with plain brown polish and a single white snowflake or dot.
Best for: Creative types with a bit of patience. This design makes a fantastic statement for Christmas Eve or a holiday open house.
7. Matte Gingerbread Cookie Texture
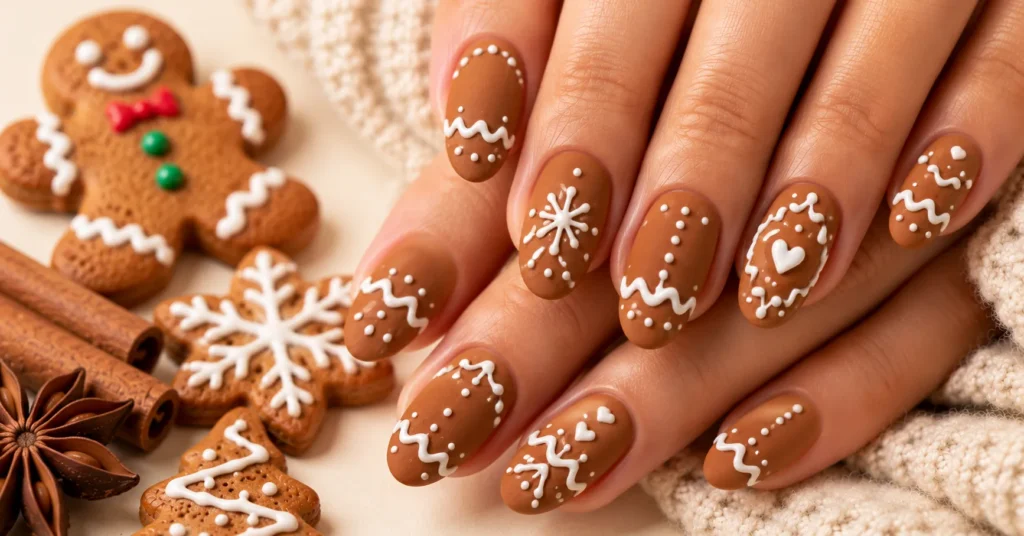
Real gingerbread cookies have a soft, slightly powdery surface. A matte top coat recreates that finish perfectly, which is why matte gingerbread nails look almost good enough to eat.
How to create it: Paint two coats of medium brown polish. Add white icing details like crisscross lines, dots along the edges, or simple swirls. Once everything is completely dry, apply a matte top coat over the whole nail. For striking contrast, go back and brush a glossy top coat only over the icing lines. They’ll look shiny and freshly piped.
Best for: Anyone who loves texture and wants unique winter manicure ideas. The matte and gloss combination looks salon level with surprisingly little effort.
8. Candy Cane and Gingerbread Combo
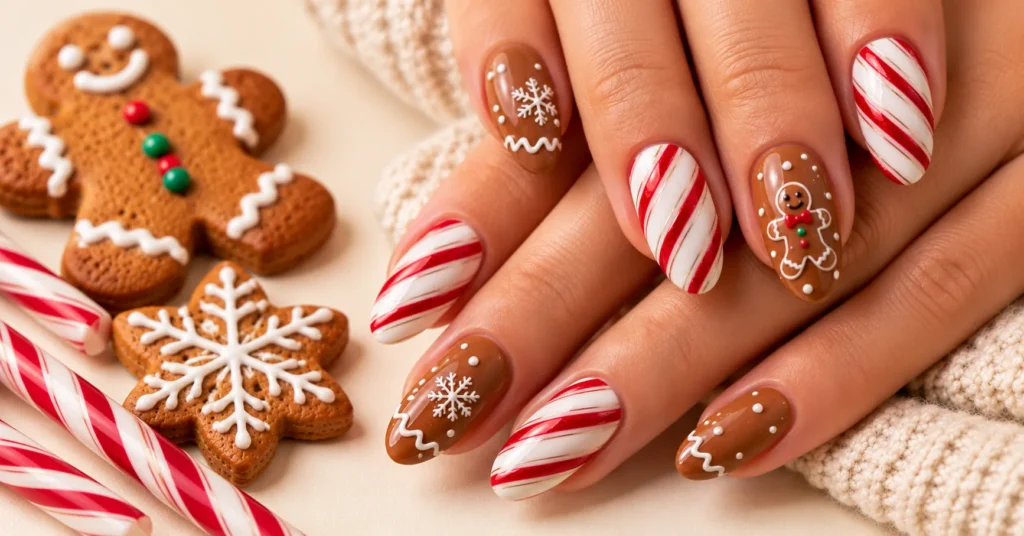
Why choose one holiday treat when you can wear two? This design alternates gingerbread nails with red and white candy cane stripes for a cheerful, high contrast look.
How to create it: Paint your thumb, middle finger, and pinky in brown with white icing details. Paint your index and ring fingers white, then add diagonal red stripes using striping tape or a thin brush. For a fun finishing touch, paint a tiny cookie character on each thumb.
Best for: Anyone who wants classic Christmas nail ideas with more color. Kids love this design too, which makes it a great option for a family nail painting night.
9. Minimalist Gingerbread Nails
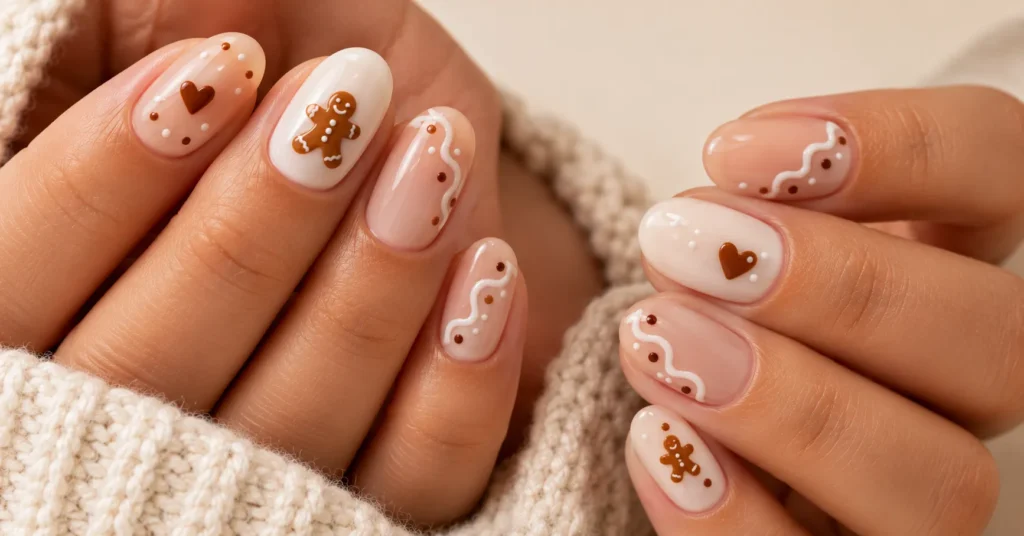
Not everyone wants a full cookie jar on their hands. Minimalist gingerbread nails keep things clean with negative space and tiny, thoughtful details.
How to create it: Start with a sheer nude or milky white base. On each nail, paint one small element, such as a tiny brown heart, a thin white wavy line, a micro cookie silhouette near the cuticle, or a trio of brown dots. Leave most of the nail bare so the design feels light and airy.
Best for: Professional settings, short nails, and anyone who prefers understated holiday nail designs. Minimal looks also grow out gracefully, so you can stretch time between appointments.
10. 3D Gingerbread Charm Nails
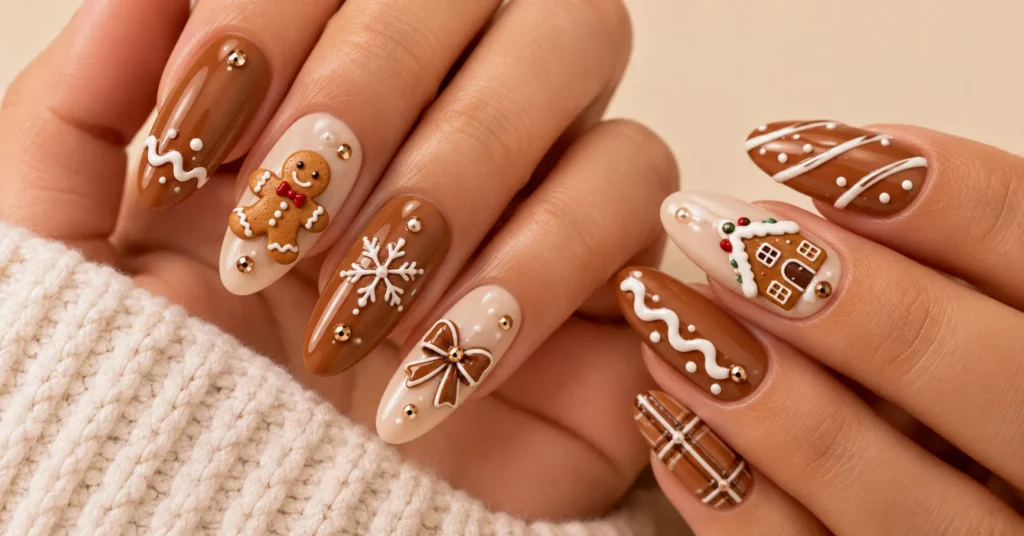
For a true showstopper, 3D gingerbread charm nails use tiny resin or acrylic cookie charms, pearls, and rhinestones to create raised, sculptural art.
How to create it: Prepare your base, whether glossy brown, glitter, or nude. Apply a small dab of nail glue or builder gel where the charm will sit. Press the charm into place and cure it or let it set. Surround it with tiny pearls or rhinestones, then seal the edges with top coat around the charm rather than over it.
Keep charms on one or two accent nails, ideally the ring finger, to avoid snagging on sweaters and scarves.
Best for: Special events, holiday photoshoots, and nail art lovers who want maximum wow factor. Longer nails give charms more room to shine.
Gingerbread Nails Design Comparison Table
Not sure which look to try first? This table compares all 10 designs by difficulty, time, and ideal occasion so you can pick the one that fits your schedule and skill level.
| Design | Difficulty | Approx. Time | Best Occasion | Ideal Nail Length |
| Classic Gingerbread Man | Medium | 60–75 min | Family gatherings | Medium to long |
| Brown Glitter | Easy | 30–40 min | New Year’s Eve parties | Any |
| Ombre | Medium | 45–60 min | Office, everyday wear | Medium to long |
| Holiday Spice | Easy | 30–40 min | Thanksgiving, casual outings | Any |
| Icing Drip French Tips | Easy to medium | 40–50 min | Work, holiday dinners | Medium |
| Gingerbread House Accent | Hard | 60–90 min | Christmas Eve | Long |
| Matte Cookie Texture | Easy to medium | 40–50 min | Everyday wear | Any |
| Candy Cane Combo | Medium | 50–60 min | Holiday parties | Medium |
| Minimalist | Easy | 20–30 min | Professional settings | Short |
| 3D Charm | Medium to hard | 60–90 min | Special events, photoshoots | Long |
If you’re new to nail art, start with the brown glitter, holiday spice, or minimalist designs. Once you’re comfortable with a detail brush, move on to the gingerbread man or house.
How to Do Gingerbread Nails at Home: Step by Step
This simple routine works for most of the designs above. Follow it once, and you’ll have the foundation for any cookie inspired look you want to try.
Step 1: Prep Your Nails
Remove old polish completely. Trim and file your nails into your preferred shape, then gently push back your cuticles. Wipe each nail with rubbing alcohol or polish remover to remove oils so your polish adheres properly.
Step 2: Apply a Base Coat
A base coat protects your natural nails from staining, which matters with darker brown shades. It also helps your manicure last longer. Let it dry for a minute or two before moving on.
Step 3: Paint the Cookie Base
Apply two thin coats of your chosen brown or tan shade. Thin coats dry faster and resist chipping better than one thick layer. Let the base dry fully before adding details, or you’ll drag the color with your brush.
Step 4: Add the Icing Details
Dip a fine detail brush into white polish and wipe off most of it. Too much polish creates blobs instead of clean lines. Draw wavy lines, zigzags, or scallops with light, steady pressure. Rest your painting hand on a table to keep it stable.
Step 5: Add Candy Accents
Use a dotting tool to place tiny red, green, or pink dots for buttons and gumdrops. Black dots work for eyes. Clean the tool between colors so the shades stay bright.
Step 6: Seal with Top Coat
Wait a few minutes for your details to set, then float a top coat over each nail. Avoid pressing the brush down hard, which can smear the icing. Cap the free edge by swiping top coat along the tip to prevent chips.
Best Color Palettes for Gingerbread-Inspired Manicures
The right palette sets the whole mood of your manicure. Brown is the star, but supporting shades can make your look feel traditional, glamorous, or romantic. Use this table to find your favorite combination.
| Palette Name | Key Shades | Overall Vibe |
| Classic Cookie | Tan, bright white, candy red | Traditional and cheerful |
| Spiced Latte | Caramel, cream, cinnamon | Soft and cozy |
| Chocolate Glam | Espresso, gold glitter, white | Luxe and dramatic |
| Sugar Plum | Mocha, blush pink, white | Sweet and romantic |
| Woodland Winter | Chestnut, forest green, white | Earthy and natural |
Warmer undertones tend to look most “baked” and realistic. If your skin has cool undertones, try a mocha or taupe base. These shades still read as cookie-brown without clashing with your complexion.
Choosing the Right Nail Shape and Length
Shape changes how a design reads. Almond and oval nails give detailed cookie characters plenty of room and make fingers look longer. Square and squoval shapes work well for French style icing tips because the straight edge gives you a clean line to follow. Coffin nails suit 3D charms and bold glitter sets.
Short nails can absolutely pull off this trend too. Stick to minimalist accents, simple icing dots, or the holiday spice skittle look. Small details keep the design balanced and stop it from looking crowded.
Pro Tips to Make Your Gingerbread Nails Last
A great design deserves to stay chip-free through the busy season. These habits will help your manicure survive gift wrapping, baking, and endless dishwashing:
- Reapply top coat every two to three days. A fresh layer restores shine and adds a protective shield.
- Wear gloves for chores. Hot water and cleaning products are the fastest way to lift polish.
- Moisturize daily. Cuticle oil keeps the skin around your nails healthy and makes your manicure look salon fresh.
- Avoid using nails as tools. Opening cans or peeling tape can chip even the strongest gel.
If you choose gel, plan on a two to three week lifespan. Regular polish usually lasts five to seven days with good care.
Common Mistakes to Avoid
Overloading the brush. Too much white polish creates thick, wobbly icing. Wipe your brush on the bottle neck and practice on paper first.
Rushing the dry time. Adding details to a tacky base causes smudges and dragging. Patience pays off, especially with multiple layers.
Choosing the wrong white. Sheer white polish looks streaky. Opt for an opaque white or a white gel liner for bright, solid lines.
Crowding every nail. A full set of detailed cookies can look busy. Try one or two statement nails and keep the rest simple.
Skipping the base coat. Dark brown pigments can stain natural nails yellow. A base coat prevents that discoloration.
Conclusion
Gingerbread nails bring warmth, whimsy, and a little nostalgia to your holiday look. From the classic gingerbread man to sparkly glitter, soft ombre, and showstopping 3D charms, there’s a design for every skill level and every occasion. The earthy brown palette also flatters nearly everyone and stays stylish long after the cookies are gone.
Start with an easy design if you’re new to nail art, then work your way up to detailed houses and characters. With the right tools, a steady hand, and a good top coat, your gingerbread nails will look sweet enough to eat all season long. Grab your brown polish, put on a holiday playlist, and start painting.
Frequently Asked Questions (FAQs) about Gingerbread Nails
Q1: What colors do I need for a gingerbread manicure?
A1: At minimum, you’ll need a warm brown or tan base and an opaque white for icing details. Red, green, black, and pink polishes are useful for candy accents, eyes, and buttons. Gold glitter adds an optional festive sparkle.
Q2: Can I do gingerbread nails on short nails?
A2: Absolutely! Minimalist designs work best on short nails. Try painting your nails a solid toffee brown and adding a tiny white dot at the base of each nail, or do a very thin brown French tip.
Q3: What makes the “sugar” texture on gingerbread nails?
A3: The texture is usually achieved by sprinkling fine glitter or clear acrylic powder over uncured gel top coat (and then curing it) or wet regular polish. It creates a rough, granular finish that feels like sugar.
Q4: Is this trend suitable for the office?
A4: Yes! The beauty of this trend is the neutral color palette. A simple brown manicure or a gingerbread French tip is professional and understated. Save the 3D gummy buttons and heavy glitter for your holiday vacation if you have a strict dress code.
Q5: What is the best shade of brown for pale skin?
A5: For paler skin tones, look for browns with a slightly cooler or reddish undertone, like a milk chocolate or a reddish terracotta. Avoid browns that are too yellow or mustard toned, as they can sometimes wash out pale skin.
Q6: Are gingerbread nails suitable for beginners?
A6: Absolutely. Designs like brown glitter, matte cookie texture, and minimalist accents need only basic skills. A dotting tool and a fine brush are all you need to create convincing icing details.
Q7: When should I start wearing cookie themed nails?
A7: Most people start in mid November and wear the look through early January. Because brown shades feel seasonal rather than strictly Christmas themed, the style works for Thanksgiving, winter parties, and New Year’s celebrations.
Q8: Should I use gel or regular polish?
A8: Both work well. Gel gives you raised, glossy icing lines and longer wear, but it requires a UV or LED lamp. Regular polish is easier to remove and perfect for switching designs often.
Q9: How do I make the icing lines look neat?
A9: Use an opaque white polish or a white gel liner and wipe excess product off your brush. Rest your hand on a flat surface, paint with light pressure, and practice on paper or a nail wheel before starting on your nails.
Q10: Can I add charms to regular polish?
A10: Yes, but charms hold better with nail glue or builder gel. If you’re using regular polish, press the charm into a wet top coat, let it dry, then apply another layer around the charm’s edges to lock it in place.