Cocoa Nail Color: 10 Gorgeous Ideas, Shades & Pro Tips for a Luxe Manicure
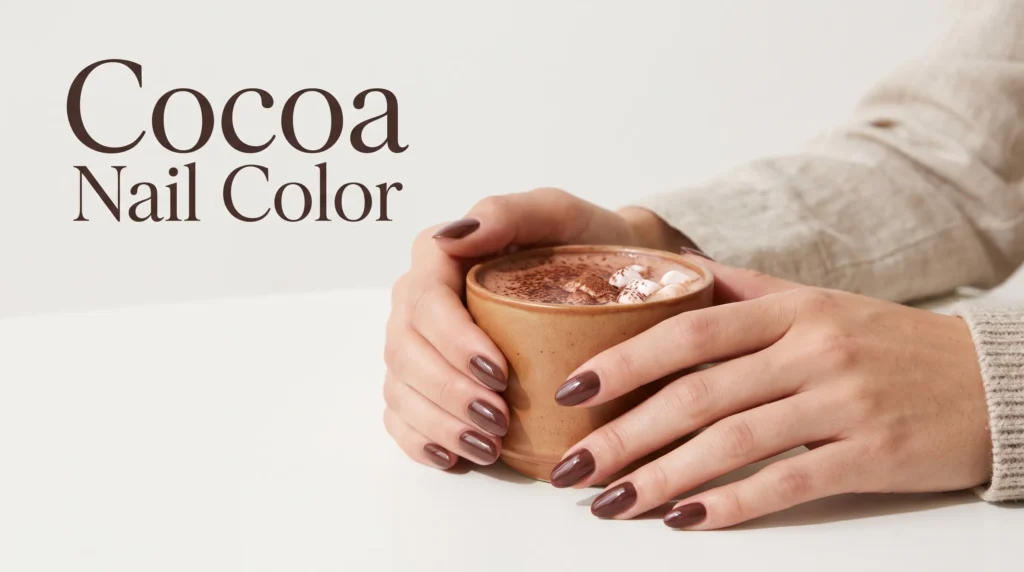
You want a manicure that feels warm and grown-up and works every day of the week. A cocoa nail color gives you all of that. The shade sits between milky latte and dark espresso. It is a medium brown with soft red undertones, so it looks rich without feeling heavy.
Brown polish also has a reputation problem. Pick the wrong one and it can look muddy, dull, or too close to your skin. This guide solves that. You’ll learn what defines the shade, which polishes to buy, and how to match a cocoa nail color to your skin tone. You’ll also get 10 cocoa nail color ideas for your next salon visit. On top of that, you’ll find a step by step at home method and the nail care habits that keep brown polish glossy for two weeks or longer.
What Is Cocoa Nail Color?
Cocoa nail color is a medium-depth brown with warm red or rosy undertones, like unsweetened cocoa powder or a mug of hot chocolate. It is lighter than espresso, warmer than taupe, and deeper than caramel.
The undertone sets it apart. An undertone (the faint secondary color beneath the main shade) decides whether a brown looks cozy or flat against your skin. Cocoa leans slightly red. That hint of warmth keeps it from looking gray or muddy, which is the most common complaint about brown polish.
Cocoa vs. Other Popular Browns
Not every brown is cocoa. The table below shows how the shade compares with its closest relatives.
| Shade | Undertone | Depth | Best For | Vibe |
| Cocoa | Warm (red/rose) | Medium | Year-round wear, all skin tones | Cozy, rich, polished |
| Latte | Warm (beige/cream) | Light | Minimalist and office looks | Soft, creamy, understated |
| Caramel | Warm (golden/orange) | Light-medium | Warm and olive skin | Sunny, sweet |
| Taupe | Cool (gray) | Light-medium | Neutral wardrobes | Muted, modern |
| Mocha | Neutral to warm | Medium | Fall, everyday wear | Smooth, balanced |
| Espresso | Neutral to cool | Deep | Evening, winter | Dramatic, moody |
| Chocolate cherry | Warm (red/purple) | Deep | Holidays, autumn | Romantic, vintage |
Here’s what separates them: cocoa nail color keeps medium depth and a rosy warmth. Caramel turns orange in sunlight, and taupe goes gray. Espresso reads almost black in dim light.
When you shop, swatch the polish on a white sheet of paper. If the brown looks faintly reddish, like dry cocoa powder, you’ve found the right shade.
Why Cocoa Nail Color Is Trending in 2026
Cocoa nail color stays in demand because brown has become fashion’s new neutral. Pantone named Mocha Mousse (PANTONE 17-1230) its 2025 Color of the Year and described it as a warm, comforting brown. That choice pushed chocolate tones into clothing, home decor, and beauty, and nail artists have kept warm browns in heavy rotation ever since.
Several forces keep the shade relevant:
- The “latte” aesthetic. Latte makeup and latte nails spread across TikTok and Instagram in 2023 and 2024. They made layered brown tones feel fresh instead of dated.
- Quiet luxury. A solid, glossy brown signals polish without loud nail art. It pairs naturally with camel coats, cream knits, and leather bags.
- Workplace friendliness. Brown reads as professional in nearly every setting, from law offices to classrooms.
- Season-spanning wear. Cocoa feels cozy in autumn, chic in winter, and earthy in summer when paired with gold jewelry and linen.
One shade that works in every season means fewer polish purchases. That’s the practical appeal. You get a sophisticated neutral that still feels like a choice, not a default.
Before your next appointment, save three reference photos showing your ideal depth of brown, since salon shade names rarely match brand names.
Who Can Wear Cocoa Nail Color? A Skin Tone Guide
Cocoa nail color flatters every skin tone when you adjust its depth and undertone. Its warm red base brightens fair and medium skin. Deeper complexions look striking in richer or more reflective versions.
There is one rule to remember: contrast matters. A brown that matches your skin too closely can make your nails disappear. Go one or two steps lighter or deeper than your skin tone, or add shimmer for separation.
| Skin Tone | Best Cocoa Variation | Why It Works | Finish to Try |
| Fair (cool/pink undertone) | Rosy cocoa | Adds warmth without looking harsh | High gloss |
| Fair (warm/peach undertone) | Milky cocoa or mocha | Softens contrast | Glossy or jelly |
| Medium/olive | Classic cocoa | Makes golden tones glow | Gloss or matte |
| Tan | Deep cocoa or chocolate cherry | Creates clear contrast | Glossy or chrome |
| Deep/dark | Espresso cocoa or glazed cocoa chrome | Adds luminous separation from skin | High gloss, chrome, or cat-eye |
How to Find Your Undertone Quickly
Your undertone shows which cocoa will look richest on your hands. Use this three-step test:
- Check your wrist veins in daylight. Blue or purple veins suggest a cool undertone, green suggests warm, and a mix suggests neutral.
- Compare gold and silver jewelry. If gold flatters you more, you lean warm. If silver looks better, you lean cool.
- Hold a white towel near your face. Rosy skin points to a cool undertone, while golden skin points to warm.
Once you know your undertone, use the table above to narrow your shopping list to one or two shades.
10 Cocoa Nail Color Ideas to Try Right Now
These 10 cocoa nail color ideas range from minimalist to statement making. Each one includes who it suits best and how to request it at the salon.
1. Classic Glossy Cocoa
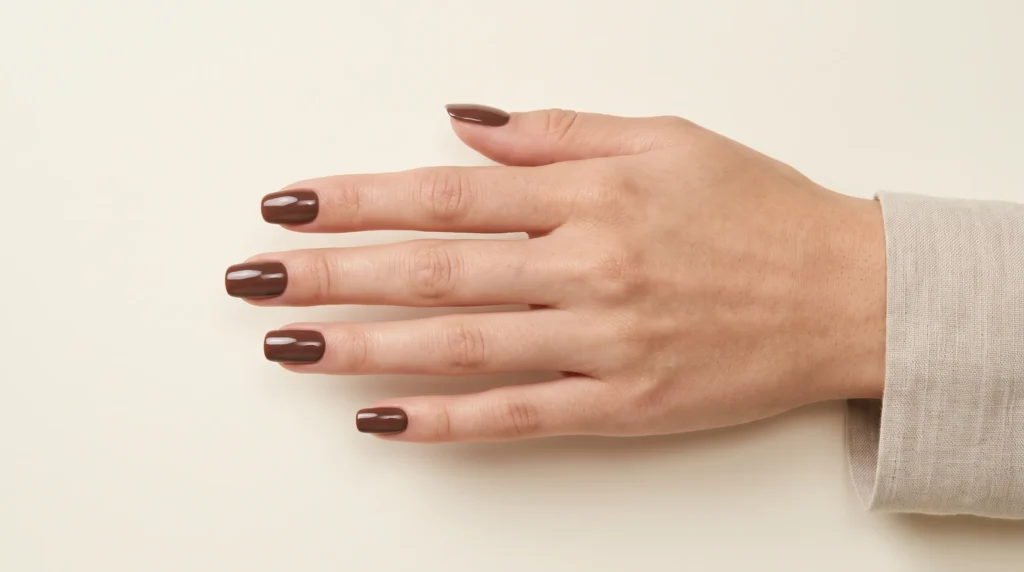
A solid, high-shine cocoa is the foundation of every design on this list. It looks clean, expensive, and appropriate for any occasion.
Ask for two thin coats of color and a gel or high gloss top coat. Brown shows dullness quickly, so shine makes the biggest visual difference. Short squoval nails (a square shape with softened corners) keep the look modern.
Best for: Office settings, first timers, and anyone who wants low-effort elegance.
2. Cocoa French Tips
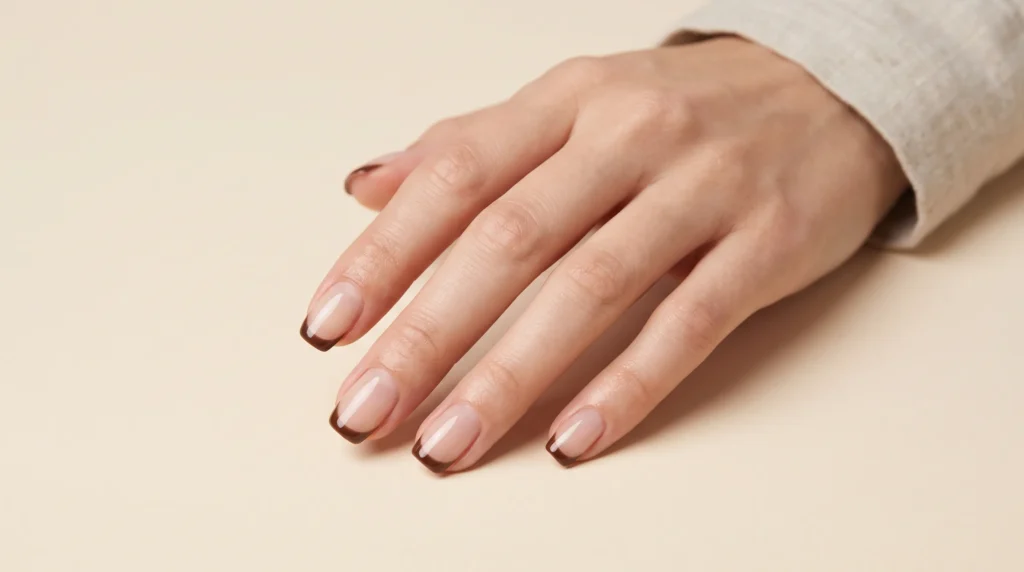
A cocoa French manicure swaps the white tip for a thin brown stripe. The sheer nude base keeps it subtle, and the brown edge adds warmth.
This style grows out gracefully. The base matches your natural nail, so regrowth at the cuticle stays hard to spot for two to three weeks. For a softer take, ask for a “micro French” (an extra-thin tip line).
Best for: Minimalists and people who want color without full coverage.
3. Latte to Cocoa Ombré
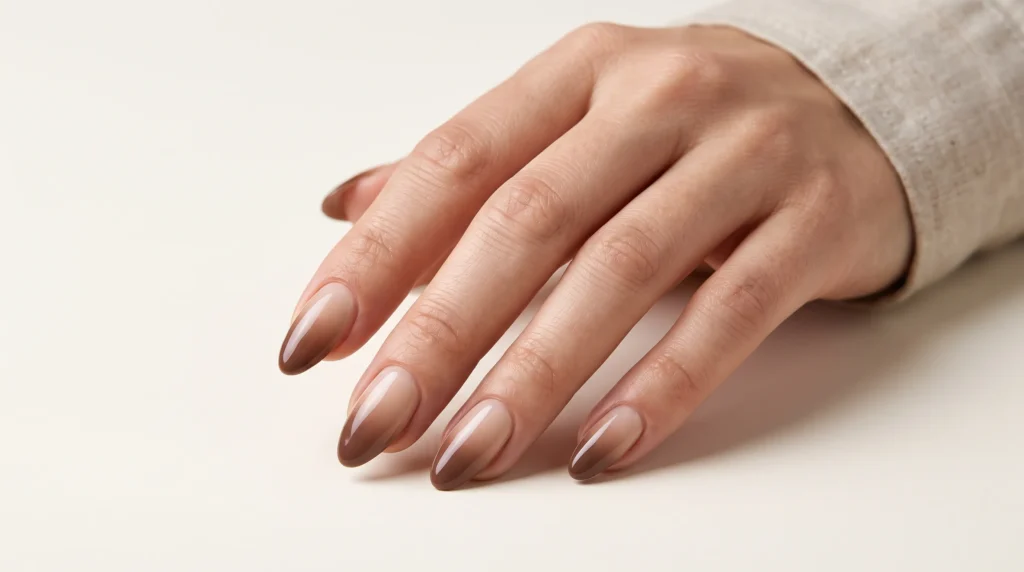
An ombré (a gradual blend from one color into another) fades from creamy latte at the cuticle to deep cocoa at the tips. The effect looks like coffee swirled into milk.
Nail techs create ombré with a makeup sponge or an airbrush. Plan for 15 to 30 extra minutes compared with a solid color.
Best for: Special events and medium to long almond or oval nails.
4. Glazed Cocoa Chrome
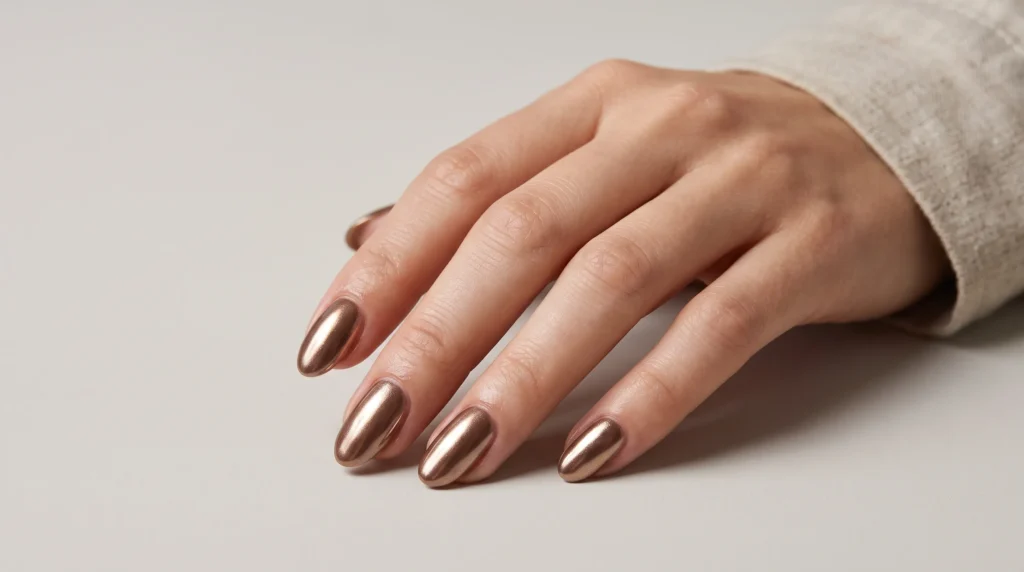
Chrome powder buffed over cured gel creates a reflective, pearly finish. A clear “glazed” pearl powder over cocoa gel gives a soft sheen that looks like chocolate glaze. A bronze tinted chrome gives a bolder metallic shine.
Chrome needs a gel base and a no wipe top coat to stick. Book a salon visit unless you own an LED lamp and chrome powder.
Best for: Holidays, parties, and deep skin tones that benefit from reflective contrast.
5. Velvet Matte Cocoa
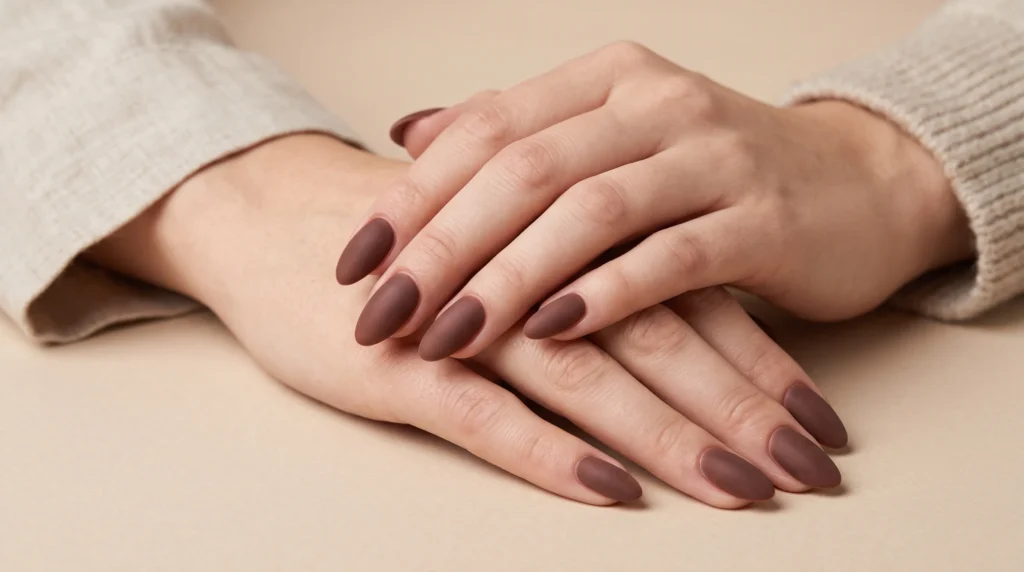
A matte top coat turns glossy brown into a soft, suede like finish. Cocoa looks especially luxe in matte because the texture echoes cashmere and suede.
Matte finishes show oil and wear faster than glossy ones. Keep hand cream off the nail surface, and wipe nails with rubbing alcohol if they start to look shiny.
Best for: Fall and winter, and anyone who loves a tactile, modern look.
6. Cocoa Tortoiseshell

Tortoiseshell nails layer sheer amber, cocoa, and near-black spots to mimic classic tortoiseshell sunglasses. The cocoa nail color acts as the middle tone that ties the darker and lighter shades together.
Jelly or sheer tinted polishes create the layered depth. Ask your nail tech for “tortie nails” and bring a photo, because spot size and density vary by artist.
Best for: Autumn, vintage-inspired outfits, and accent nails.
7. Cocoa with Gold Accents
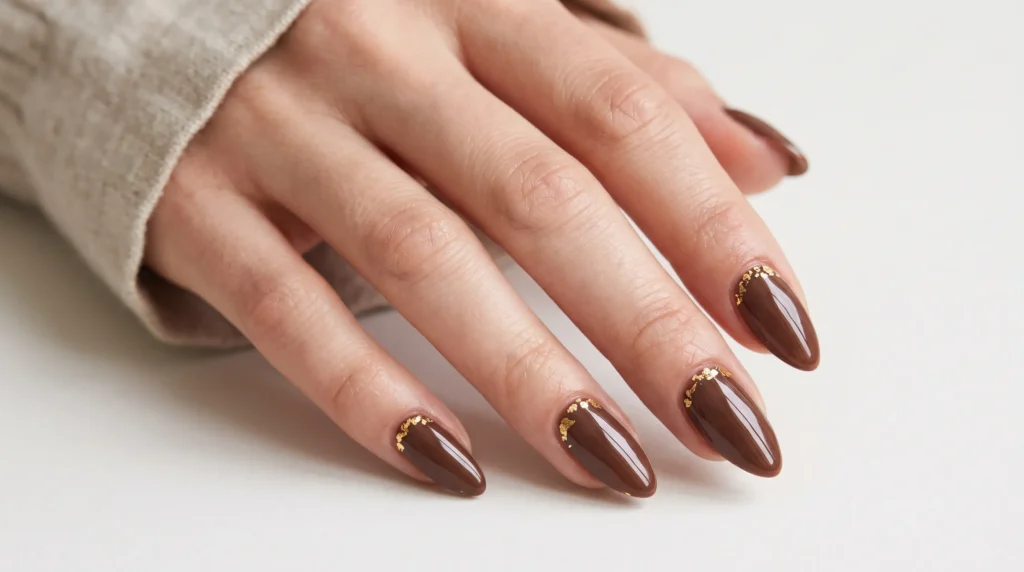
Gold foil flakes, thin striping tape, or a single gold stud add warmth and polish. One gold line at the cuticle or one foil-flecked accent nail per hand is enough.
Gold and brown share a warm undertone, so they look harmonious instead of busy. Rose gold works as a softer alternative for fair, pink-toned skin.
Best for: Weddings, holiday parties, and formal dinners.
8. Cocoa Cat Eye Nails
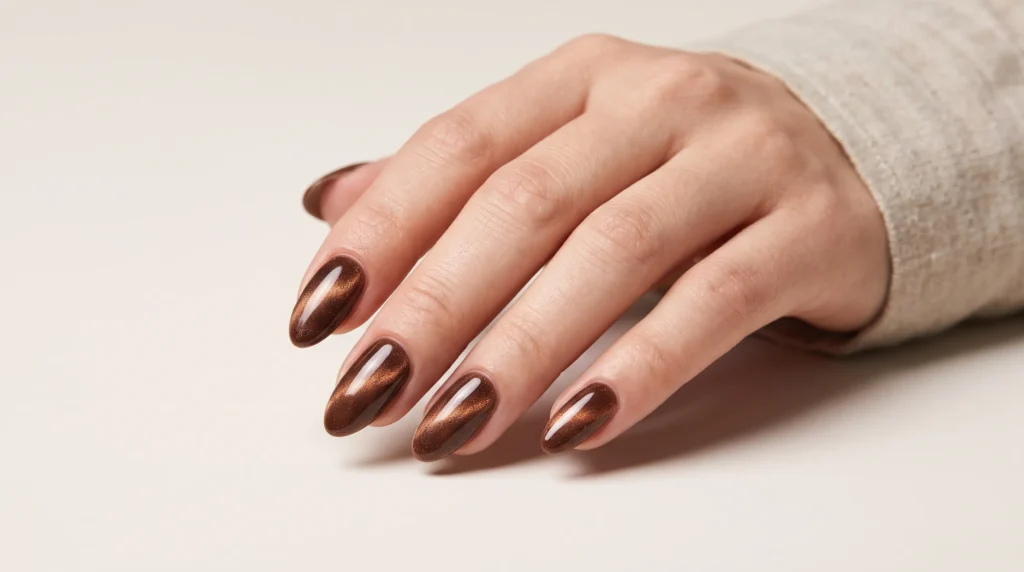
Cat eye polish (a gel containing magnetic particles that shift into a shimmering band under a magnet) gives brown a velvety, three-dimensional glow. On cocoa, the effect looks like light hitting polished wood.
You hold a magnet over each wet, uncured nail for a few seconds to set the shimmer line. Gel cat-eye kits work at home, but salons get crisper results.
Best for: Evening events, winter, and anyone who wants depth without nail art.
9. Cocoa and Cream Swirls
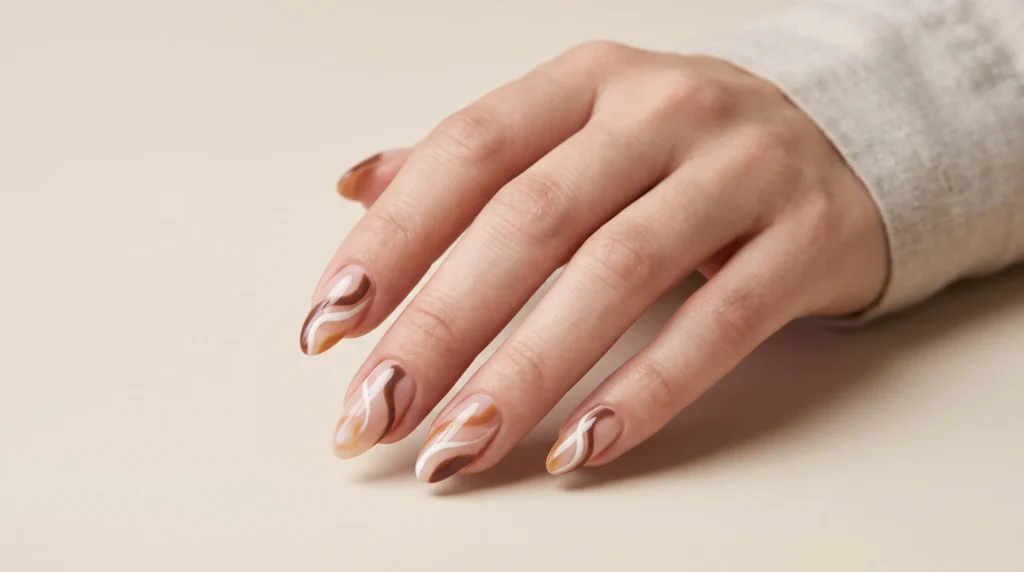
Abstract swirls in cocoa, cream, and caramel look like stirred hot chocolate. Thin, curved lines over a sheer nude base keep the design airy and modern.
This style is forgiving as it grows out. Swirls on a nude base don’t create a hard line at the cuticle, so you get extra days of wear before a fill.
Best for: Creative minimalists and short nails.
10. Five Shade Brown Gradient
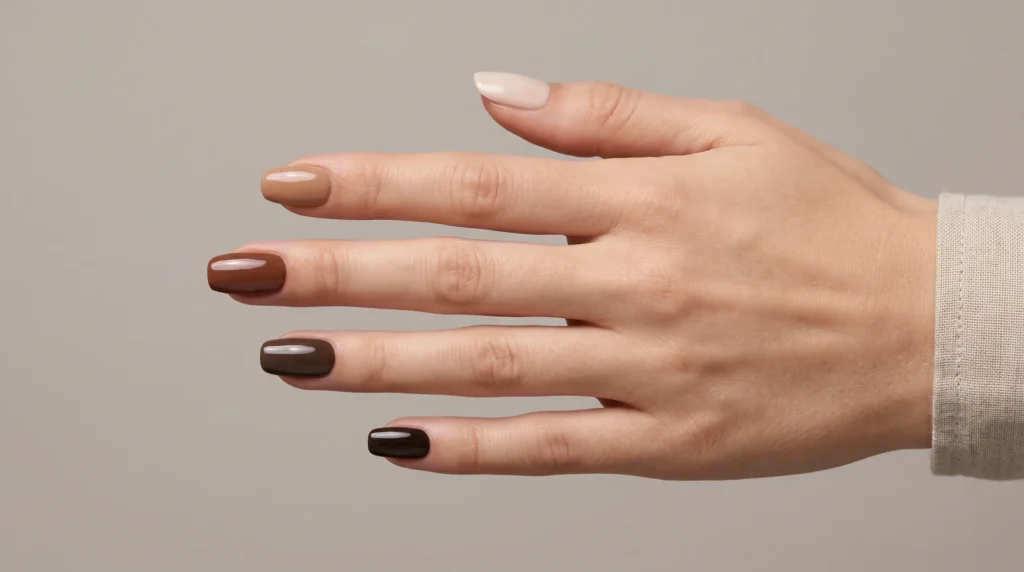
A gradient manicure paints each finger a different shade, moving from light latte on the thumb to deep espresso on the pinky. Cocoa nail color sits in the middle, usually on the ring or middle finger.
The look is easy to do at home with five bottles or a curated brown polish set. It’s also a smart way to test which brown you like best before you commit to one.
Best for: Brown lovers, beginners, and anyone who can’t choose a single shade.
Quick Comparison: Which Idea Fits Your Lifestyle?
| Idea | Difficulty | Salon or DIY | Grows Out Well? | Best Season |
| Classic glossy | Easy | Both | Moderate | All year |
| French tips | Medium | Both | Yes | All year |
| Latte-to-cocoa ombré | Medium | Salon | Yes | Fall/winter |
| Glazed chrome | Medium | Salon (gel) | Moderate | Holidays |
| Velvet matte | Easy | Both | Moderate | Fall/winter |
| Tortoiseshell | Hard | Salon | Moderate | Fall |
| Gold accents | Medium | Both | Moderate | Holidays/events |
| Cat-eye | Medium | Salon or gel kit | Moderate | Winter |
| Cocoa and cream swirls | Medium | Both | Yes | All year |
| Five-shade gradient | Easy | DIY | Moderate | All year |
Pick the design that fits your schedule and nail length, then screenshot it for your nail tech.
The Best Cocoa Nail Color Polishes to Buy
The right cocoa nail color polish makes the difference between a flat, muddy brown and a rich, glossy finish. The shades below are well-known options that nail techs and beauty editors recommend for warm brown and taupe-brown manicures.
| Polish | Brand | Formula | Shade Profile | Price Range |
| You Don’t Know Jacques! | OPI | Regular lacquer (also in gel) | Taupe-leaning cocoa | $ |
| Lincoln Park After Dark | OPI | Regular lacquer (also in gel) | Deep plum-brown | $ |
| Mink Muffs | Essie | Regular lacquer | Soft taupe-brown | $ |
| Particulière | Chanel Le Vernis | Long-wear lacquer | Greige-brown | $$ |
| Miracle Gel (brown shades) | Sally Hansen | Gel-like, no lamp | Varies, warm browns | $ |
OPI You Don’t Know Jacques! has stayed popular for well over a decade. It’s a versatile brown that flatters medium and olive skin. If you want a redder, truer cocoa, look for shades labeled “hot chocolate,” “cocoa,” or “chocolate cherry” in your favorite brand’s current lineup. Brands rotate and discontinue shades often, so check availability before you buy.
How to Choose the Right Formula
Formula affects wear time as much as color does. Here’s how the main types compare:
- Regular lacquer: Easy to apply and remove. Expect 5 to 7 days of wear.
- Gel-effect lacquer: No lamp needed, with a plumper shine. Lasts around 7 to 10 days.
- Gel polish: Cured under an LED or UV lamp. Lasts 2 to 3 weeks with proper prep.
Brown shows dullness and tip wear clearly. If you want a fresh shine without touch-ups, gel is the better match.
Start with a classic like OPI You Don’t Know Jacques!, then branch into chrome or cat-eye once you know your favorite depth of brown.
Gel vs. Regular Polish vs. Press-Ons
Every method can deliver a cocoa manicure, but each has tradeoffs. Gel offers longevity, regular polish offers flexibility, and press-ons offer speed.
| Method | Wear Time | Cost per Manicure | Removal | Nail Health Impact |
| Regular polish | 5–7 days | Low | Easy (remover) | Gentle |
| Gel polish | 2–3 weeks | Medium to high | Acetone soak (10–15 min) | Moderate if removed poorly |
| Dip powder | 3–4 weeks | High | Long acetone soak | Moderate |
| Press-ons | 1–2 weeks | Low to medium | Warm soapy water or oil soak | Gentle with adhesive tabs |
Press-ons suit anyone who wants complex designs like tortoiseshell or ombré without a long appointment. Brands such as Kiss and Glamnetic sell brown and neutral sets in short and medium lengths.
Gel needs a safety note. Gel polish cures under UV or LED lamps. The American Academy of Dermatology recommends applying broad-spectrum sunscreen to your hands or wearing fingerless UV-protective gloves during gel manicures.
Never peel gel off. Peeling strips layers of the nail plate along with the color, which leaves nails thin and flaky.
If you book gel regularly, bring a pair of fingerless UV gloves to your next salon appointment.
How to Do Cocoa Nails at Home: Step-by-Step
A salon-quality brown manicure at home comes down to prep, thin layers, and a strong top coat. Medium browns are forgiving with streaks, but they show flooded cuticles and dull spots clearly.
What You’ll Need
- Nail file and soft buffer
- Cuticle pusher (orange wood stick or metal)
- Rubbing alcohol or nail dehydrator
- Base coat
- Your chosen cocoa nail polish
- High-gloss top coat
- Small flat brush and acetone for cleanup
The 8-Step Method
- Remove old polish completely. Use remover, then wash and dry your hands thoroughly.
- Shape your nails. File in one direction to prevent splitting. Squoval, oval, and almond shapes suit brown well.
- Push back your cuticles. Gently move them toward the nail base. Don’t cut live skin.
- Dehydrate the nail plate. Swipe each nail with rubbing alcohol to remove oils that cause lifting and chips.
- Apply a base coat. A base coat helps color grip and stops dark pigment from tinting your natural nails.
- Paint two thin coats of color. Use the three-stroke method: one stripe down the center, then one on each side. Wait two minutes between coats.
- Clean up the edges. Dip a small flat brush in acetone and trace around each cuticle for crisp lines.
- Seal with a top coat. Run the brush along the free edge of each nail (“capping”) to protect the tips from wear.
Pro Tips for a Rich, Even Finish
Thin coats beat thick ones. Thick layers stay soft underneath and dent easily. Two thin coats dry faster and look smoother.
Shine is everything with brown. A glossy top coat makes cocoa look rich and dimensional, while a worn top coat makes it look flat. Reapply top coat every two to three days for regular lacquer.
Roll the bottle between your palms instead of shaking it. Shaking adds air bubbles, which show up as tiny dots on dark shades.
For your next home manicure, set a two-minute timer between coats so you don’t rush the drying process.
Nail Care Tips to Make Your Cocoa Manicure Last
Good nail care adds days to any cocoa manicure. Most chips come from water exposure, dryness, and a worn-down top coat.
Daily Habits That Prevent Chips
- Wear gloves for dishes and cleaning. Hot water and detergents soften polish and lift it at the edges.
- Apply cuticle oil daily. Jojoba-based oils absorb well and keep nails flexible, which reduces cracking.
- Refresh your top coat every two to three days to restore shine.
- Use your fingertips, not your nails, to open cans, peel labels, or press buttons.
Common Mistakes to Avoid
Small errors can cut wear time in half. Watch for these:
- Skipping the base coat. Dark pigments can tint natural nails, and polish grips poorly without a base.
- Painting over oily nails. Lotion residue stops polish from bonding. Always dehydrate first.
- Applying thick coats. Thick layers take hours to harden and smudge easily.
- Showering right after painting. Polish feels dry in minutes but takes longer to fully set. Wait at least an hour.
- Peeling off chipped polish. This strips nail layers and leads to weak, flaky nails.
Removing Brown Polish Without Smudging
Dark polish can smear across your cuticles during removal. Press a soaked cotton pad onto each nail for 10 to 15 seconds so the color dissolves before you wipe. Then wipe downward toward the tip in one motion.
If your natural nails look slightly tinted afterward, buff gently with a soft buffer and follow with cuticle oil to restore moisture.
Keep a bottle of jojoba cuticle oil on your nightstand so daily application becomes automatic.
How to Style Cocoa Nail Color for Every Occasion
Cocoa nail color works like a warm neutral with depth. It pairs with earth tones, jewel tones, and metallics, which makes styling simple.
Outfit Pairings That Work
- Creams and camels: Tonal outfits in ivory, oatmeal, and camel make brown nails look expensive.
- Denim: A white tee, light-wash jeans, and cocoa nails create an easy weekend look.
- Jewel tones: Emerald, burgundy, and deep teal look rich next to warm brown.
- Black: Cocoa softens an all-black outfit without breaking its sleek effect.
Seasonal Styling Guide
| Season | Best Cocoa Variation | Pair With |
| Spring | Cocoa French tips or cream swirls | Linen, blush pink, sage green |
| Summer | Classic glossy cocoa with gold accents | White, denim, gold jewelry |
| Fall | Velvet matte or tortoiseshell | Camel coats, knits, leather |
| Winter | Glazed chrome or cat-eye | Velvet, cream wool, metallics |
Matching Your Manicure to Makeup and Jewelry
Brown nails pair naturally with warm, bronzed makeup. A nude-brown or mocha lip creates a coordinated “latte” look, while a brick-red lip adds contrast.
Jewelry shapes the final effect. Gold amplifies cocoa’s warmth and suits warm and olive skin. Rose gold softens the look for fair skin, and silver creates a cooler, more modern contrast.
Pull one gold or rose-gold piece from your collection and test it against your manicure before your next event.
Conclusion
A cocoa nail color gives you a manicure that feels warm, polished, and right for any season. Its rosy undertone keeps brown from looking muddy, and small shifts in depth or finish make it flatter every skin tone.
Keep these takeaways in mind:
- Match depth to your skin tone. Go a step lighter or deeper than your skin for contrast.
- Choose a formula by lifestyle. Lacquer gives you flexibility, and gel gives you shine that lasts.
- Protect the shine. A fresh top coat and daily cuticle oil keep cocoa looking rich.
You now have 10 design ideas, a shade shortlist, and a step-by-step method that works. Pick one cocoa nail color idea from the list and grab a bottle like OPI You Don’t Know Jacques!. Then set up your home manicure station tonight or book your next salon appointment.
Frequently Asked Questions About Cocoa Nail Color
1. What is cocoa nail color?
Cocoa nail color is a medium-depth brown with warm red or rosy undertones, similar to cocoa powder or hot chocolate. It’s lighter than espresso, warmer than taupe, and deeper than caramel.
2. Does cocoa nail color suit all skin tones?
Yes. Fair skin suits rosy or milky cocoa, medium and olive skin glows in classic cocoa, and deep skin looks striking in espresso-cocoa, chrome, or cat-eye finishes that create contrast.
3. Is cocoa nail color good for fall only?
No. Cocoa works year-round. Choose matte or tortoiseshell for fall, chrome or cat-eye for winter, French tips for spring, and glossy cocoa with gold accents for summer.
4. How long does a cocoa manicure last?
Regular polish lasts 5 to 7 days, gel-effect polish lasts 7 to 10 days, and gel lasts 2 to 3 weeks. Wearing gloves for chores and refreshing your top coat extends wear.
5. Is cocoa nail color professional enough for work?
Yes. A solid, glossy cocoa on short, well-shaped nails looks polished in nearly every workplace. Stick to classic, matte, or French tip versions for formal offices.
6. What’s the difference between cocoa and mocha nails?
Cocoa has a warmer, slightly red undertone. Mocha is more neutral and balanced, sitting between cocoa and taupe. Both are medium-depth browns, but cocoa reads cozier and richer.
7. Why does my brown polish look dull?
Brown shows a worn top coat quickly. Apply a high-gloss top coat, cap the free edge, and refresh it every two to three days. Gel polish holds its shine longest.
8. Can beginners do cocoa nail art at home?
Yes. Start with solid color, a five-shade brown gradient, or simple gold foil accents. Save tortoiseshell, chrome, and ombré for a salon visit or for when you feel more confident.